Tag Archive for: dessert

Berry Breakfast Cobbler

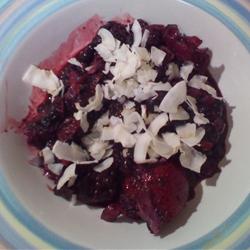
Walker and I have a morning routine that really never varies during the school week- I guess that is why they call it a routine.  I wake Walker up at 7- we get dressed, and he goes downstairs to fix breakfast while I make the beds.  Corby on the other hand, usually gets up around 6 and is doing work or reading the paper when we get downstairs.  Walker eats breakfast while I feed Nemo, our dog and let him out.  Then we leash up Nemo and go outside to the corner to wait for Walker’s carpool and Corby heads to work.  After everyone is out of the house, I get about 30 minutes to exercise. I do work out videos in our den. I love them.  I have a ridiculous collection of them.  Anyway, after I work out, I shower and then ride my bike to work.  Breakfast is usually whatever candy is at the front desk of the library which defeats the entire purpose or maybe is the entire purpose of working out- not sure which one.  So, I have been trying to find easy, slightly more healthy breakfast options than 8 Hershey Kisses.  This berry cobbler from www.allrecipes.com is super easy, quick and so delicious, and it is sweet enough for me not to go into sugar withdrawal after switching from candy.

Berry Breakfast Cobbler

Ingredients:

2 1/2 cups mixed frozen berries

1 tablespoon brown sugar

1/2 cinnamon stick, ground
2 tablespoons flax seeds, ground
1/4 cup unsweetened flaked coconut

Directions:

Stir the berries and brown sugar together in a microwave-safe bowl; heat on High until the berries are hot, about 2 minutes, stirring once about 1 minute into the heating process. Stir the ground cinnamon, ground flax seeds, and coconut into the heated berries and serve.


Glazed Lemon Bread

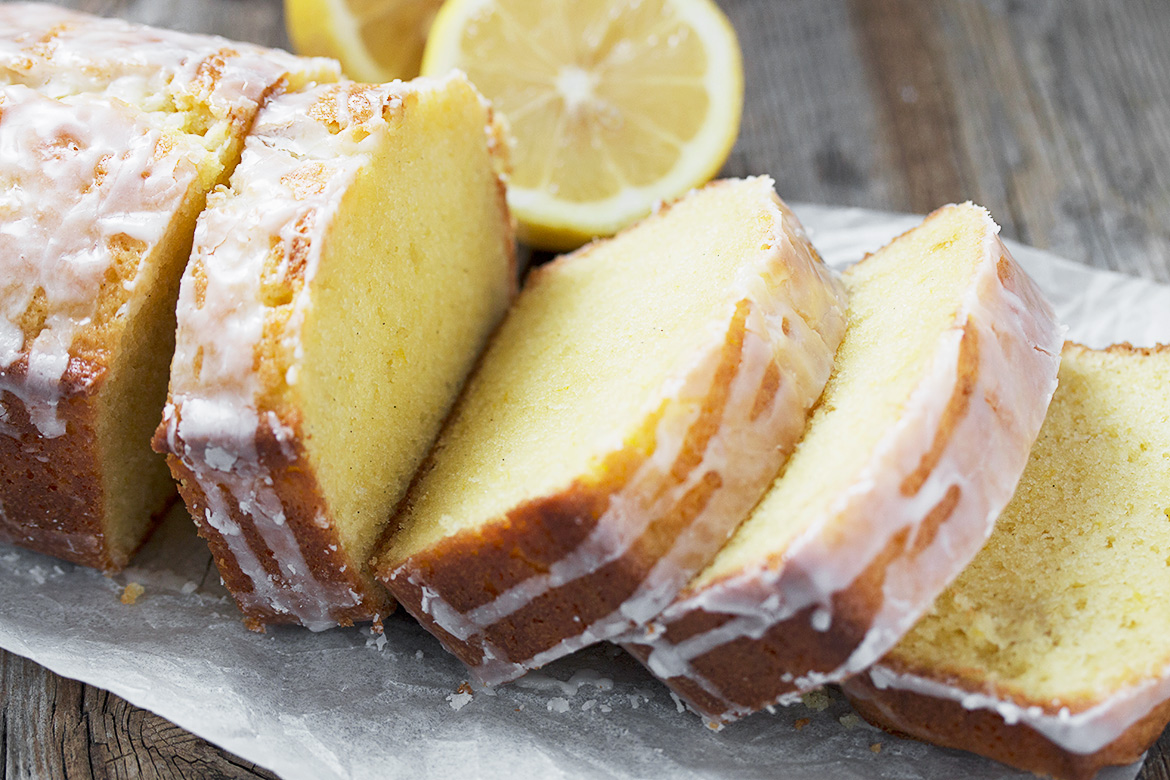
Now that it is finally getting warm out and hopefully staying that way, there is nothing more refreshing on a hot day than the taste of lemon.  For some reason to me, the taste of lemon always seems cool.  This is a great recipe for a glazed lemon bread which is really a dessert, but I think it is a treat any time- especially for breakfast.

Glazed Lemon Bread

Ingredients:

1/4 cup butter, softened
3/4 cup white sugar
2 eggs
2 teaspoons grated lemon peel
2 cups all-purpose flour
1 teaspoon salt
2 1/2 teaspoons baking powder
3/4 cup milk
1/2 cup chopped walnuts2 tablespoons white sugar
2 teaspoons lemon juice

Directions:

Preheat oven to 350 degrees F (175 degrees C). Lightly grease 1 9×5 inch loaf pan.
In a large bowl, cream together the butter and 3/4 cup sugar until light and fluffy. Stir in the eggs one at a time, beating well with each addition, then stir in the lemon peel. In a separate bowl, sift together the flour, salt and baking powder.
Blend the flour mixture into the egg mixture, alternately with the milk; stir just to combine. Fold in the nuts; mixing just enough to evenly combine. Pour batter into prepared loaf pan.
Bake in preheated oven for 50 to 55 minutes, until a toothpick inserted into center of loaf comes out clean.
In a small bowl, dissolve 2 tablespoons sugar in the lemon juice. After loaf has cooled for 10 minutes, spoon glaze over loaf.

Chocolate Cheese Layered Bars

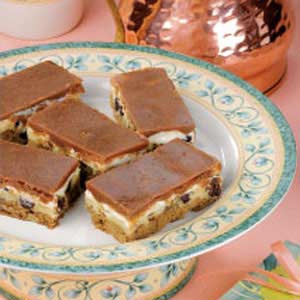
I am always on the hunt for new recipes- especially ones that involve cheese or chocolate.  This is the first time I have come across one that has both, and while that might be a little intimidating at first, these chocolate cheese layered bars are fantastic!  It is cream cheese which is maybe better than trying to mix a sharp cheddar with chocolate- but who knows- that might be pretty awesome as well.  Either way- you should definitely try these bars.


Chocolate Cheese Layered Bars

Ingredients:

1/2 cup butter, softened
1 cup sugar
2 eggs
1 ounce unsweetened chocolate, melted
1 teaspoon vanilla extract
1 cup all-purpose flour
1 teaspoon baking powder
1/2 cup chopped pecans

CHEESE LAYER:

6 ounces cream cheese- softened
1/4 cup butter, softened
1/2 cup sugar
1 egg
2 tablespoons all-purpose flour
1/2 teaspoon vanilla extract
1/4 cup chopped pecans
1 cup (6 ounces) semisweet chocolate chips
3 cups miniature marshmallows

TOPPING:

1/4 cup butter

2 ounces cream cheese- softened
1 ounce unsweetened chocolate
2 tablespoons milk
3 cup confectioners’ sugar
1 teaspoon vanilla extract

Directions:

In a large bowl, cream butter and sugar until light and fluffy. Beat
in eggs. Beat in chocolate and vanilla until well blended. Combine
flour and baking powder; stir into chocolate mixture. Fold in
pecans. Pour into a greased 13-in. x 9-in. baking pan.

In another large bowl, combine cream cheese and butter. Beat in the
sugar, egg, flour and vanilla until well combined. Fold in pecans.
Spread over the chocolate layer; sprinkle with chips.

Bake at 350° for 20-25 minutes or until edges pull away from
sides of pan. Sprinkle with marshmallow; bake 2 minutes longer or
until puffed. Spread evenly over cream cheese layer. Cool on a wire
rack.

In a large saucepan, combine first four topping ingredients. Cook and
stir over low heat until smooth. Transfer to a large bowl. Add the
confectioners’ sugar and vanilla; beat until smooth. Spread over
cooled bars. Store in the refrigerator.


Huguenot Torte

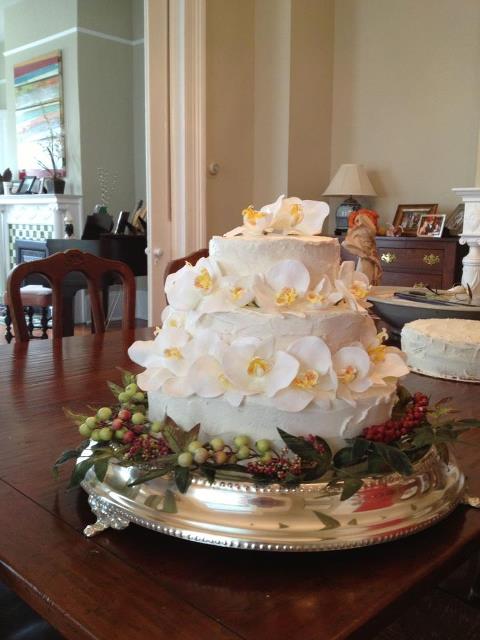
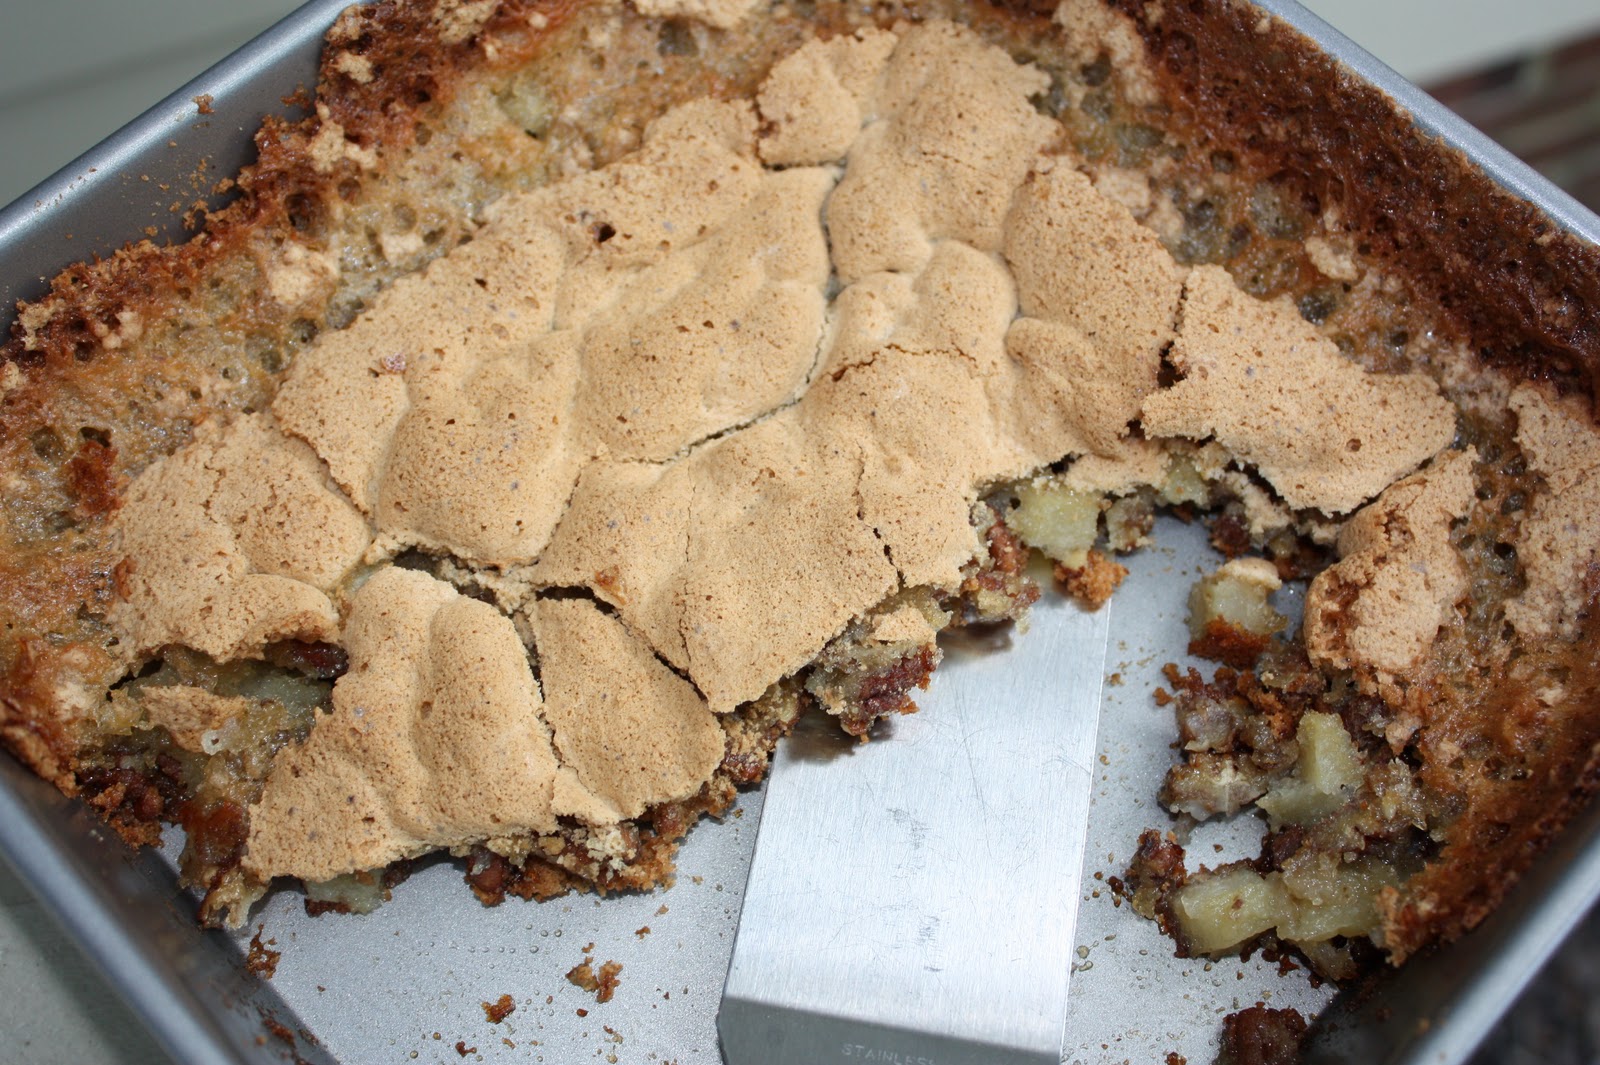
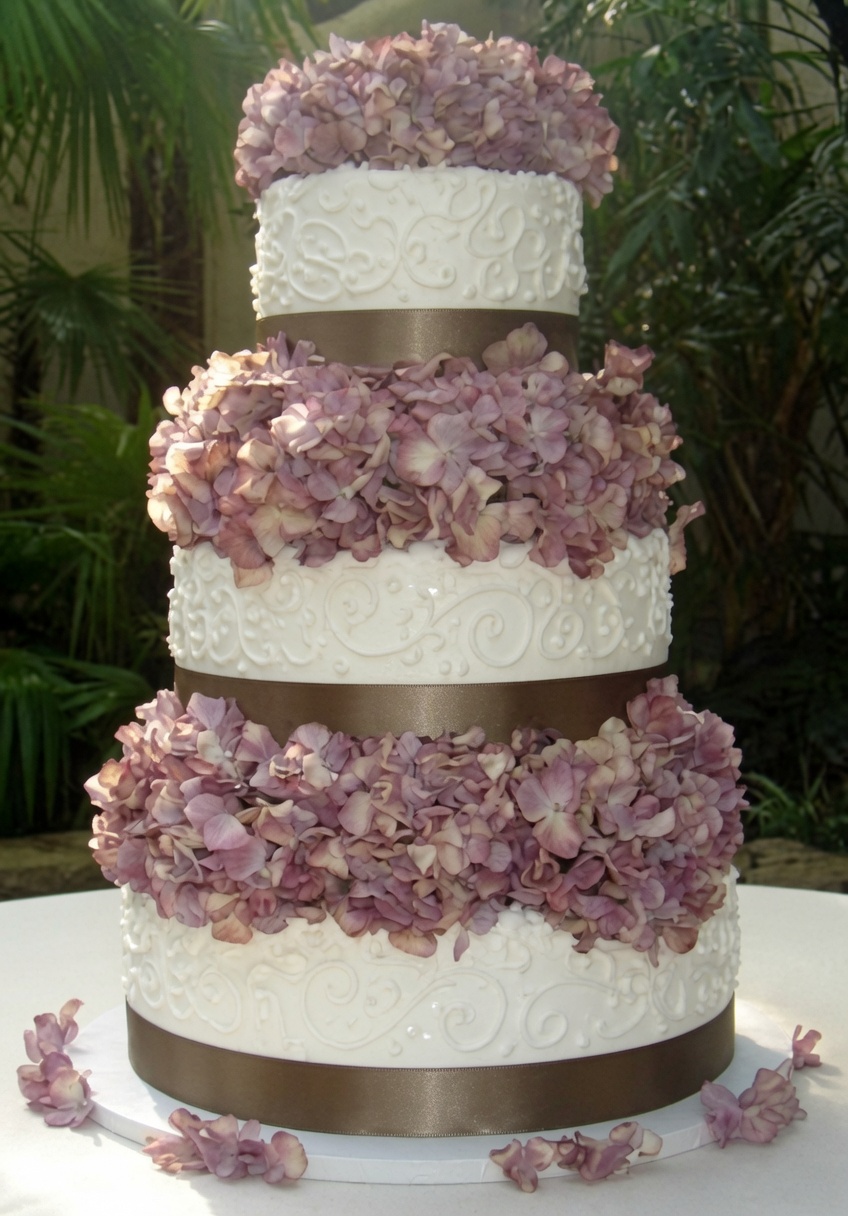
The wedding is done, and we had a fantastic weekend!  And the cake turned out well which I could not have done without the help of my dear college friend Lance!!  Thanks to her secret icing recipe and talking me through some basics, it all came together!  She is a fantastic baker, and if you live in Vermont or even if you don’t, you should check out her stuff on her facebook page Takes The Cake Vermont.   The photographer took better pictures, but I don’t have those yet, so here is the one I took at my house before transporting the cake.  The food was wonderful, the weather turned out well despite a torrential storm and flood on Friday night.  The water outside of my parents house where we had the rehearsal party was mid calf deep when people were trying to leave.  It added some drama, but it was really funny to see everyone with their pants rolled up and shoes off trying to get to their cars.  We are not really going on a honeymoon, but we are going to Savannah this weekend for a quick get-a-way.  Shockingly, I have never been to Savannah despite living in Charleston, so I am really looking forward to it.  I did take this past Monday off from work to relax, and while sunning on the porch, I came across a recipe for Huguenot Torte in the South of Broad magazine.  I have not had this in so long, and I was so happy to see a recipe for it.  Such a traditional Charleston recipe and so delicious.

Huguenot Torte

Ingredients:

4 eggs
3 cups sugar
8 tablespoons flour
5 teaspoons baking powder
½ teaspoon salt
2 cups chopped tart cooking apples
2 cups chopped pecans or walnuts
2 teaspoons vanilla

Directions:

Beat whole eggs in electric mixer or with a rotary beater until very frothy and lemon-colored. Add other ingredients in above order. Pour into two well-buttered baking pans about 8 x 12 inches. Bake in 325 degree oven about 45 minutes or until crusty and brown. To serve, scoop up with pancake turner (keeping crusty part on top), pile on large plate and cover with whipped cream and a sprinkling of the chopped nuts, or make 16 individual servings.


An Update on the Wedding Cake

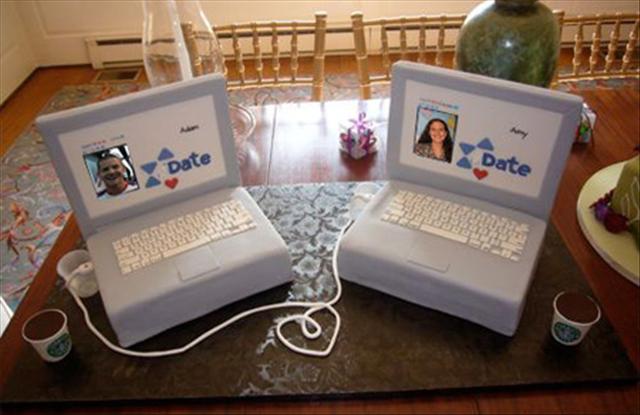
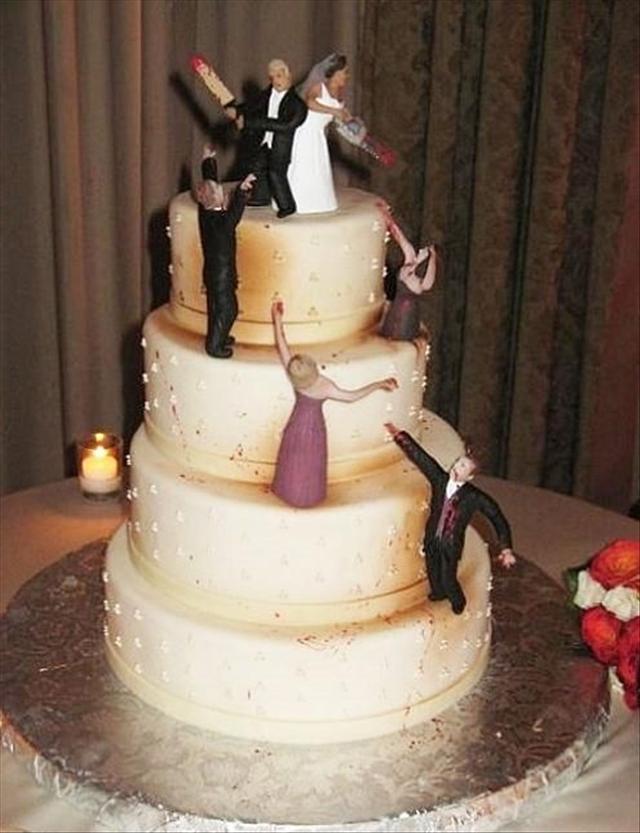
I am getting married in 8 days.  It is amazing how fast this has gone- granted I didn’t want much time between engagement and wedding, and everything is all done- except that I still have to make the wedding cake.  This is the only thing that I am feeling at all stressed about, but I figure if it doesn’t work out- I can always run the the grocery store and buy a cake or a lot of cakes- either way- should be fine, right?  This definitely has been an eye opening experience since I have now googled how to assemble/decorate a wedding cake and watched lots of videos.  For example, I was wondering how in a tiered cake is there frosting underneath the different tiers.  Apparently, you put each tier on cardboard and that way it is easy to disassemble and serve.  Also, I found out that you need to put supports in the cake so it all stays together.  Thank goodness for Amazon.com and there vast amount of baking supplies.  As for decorating, well that will just be a morning of creation.  In searching for decorating ideas, I came across a website of ridiculous wedding cakes 30 Hilariously Terrible Wedding Cakes.  I don’t think I will model our cake after any of these, but here are a few of my favorites!

Homemade Oreos

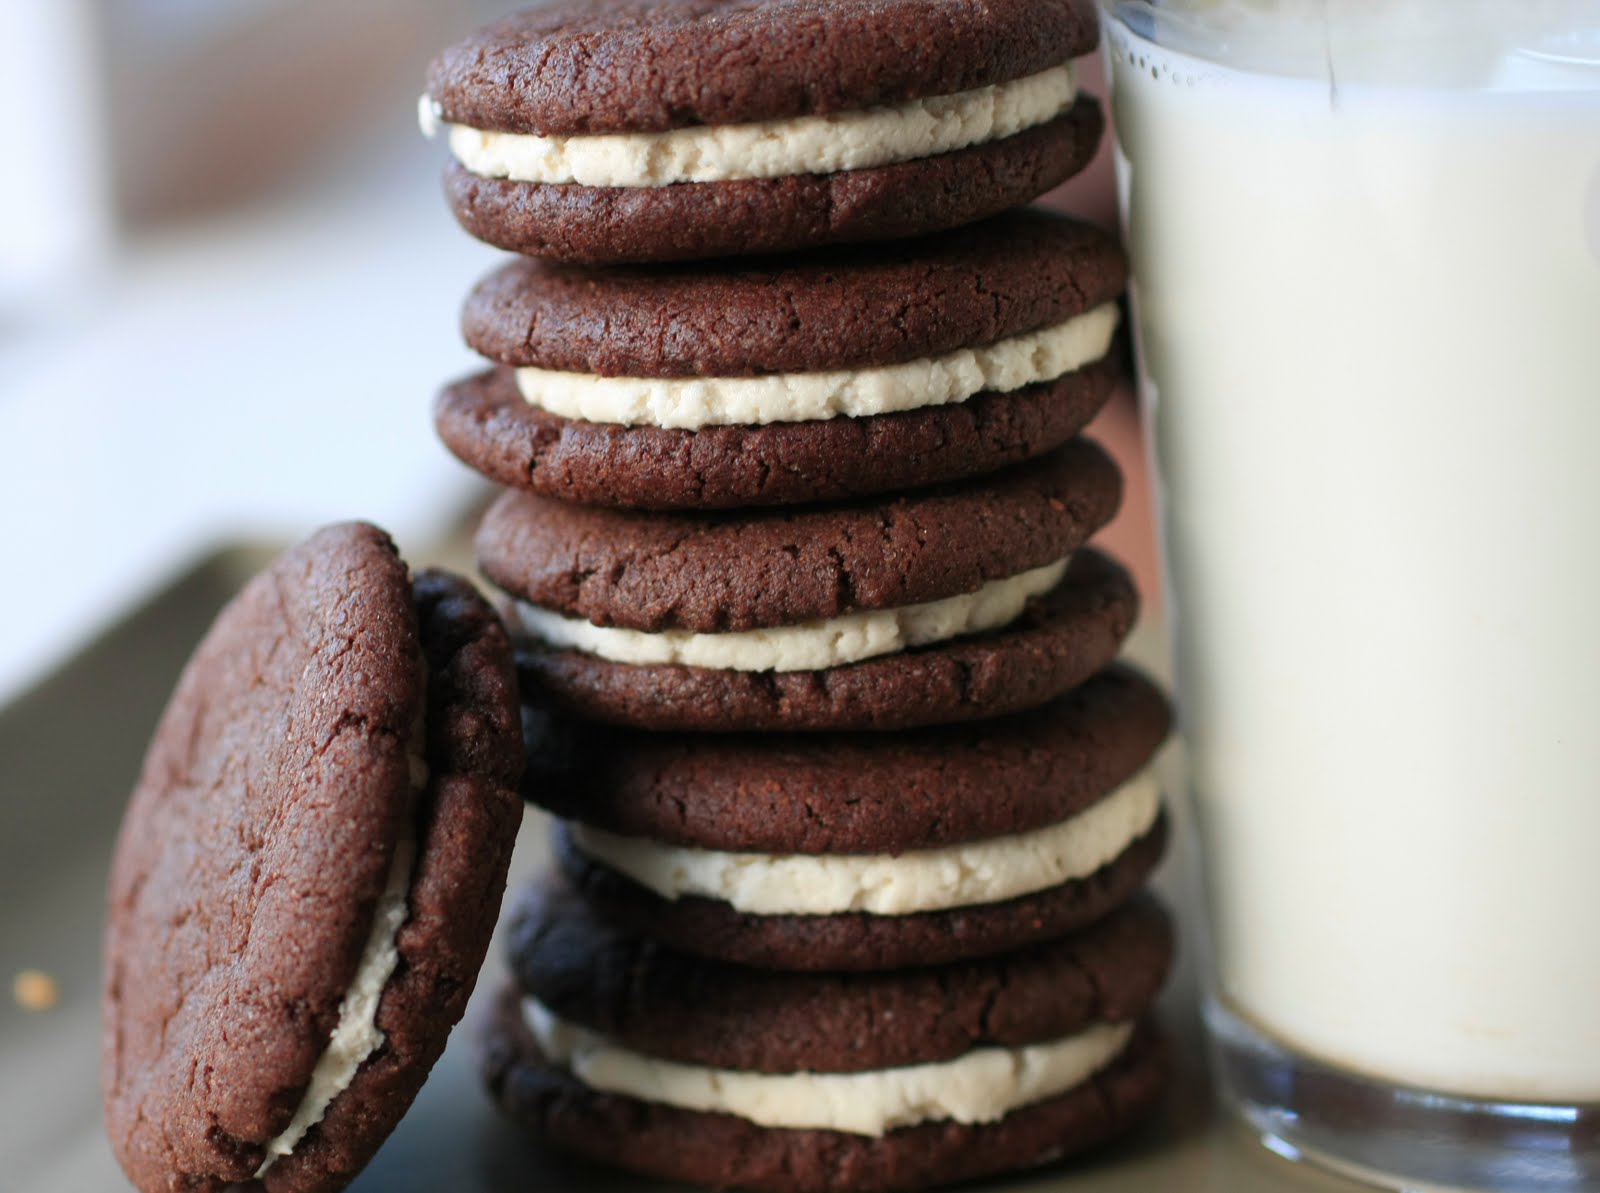
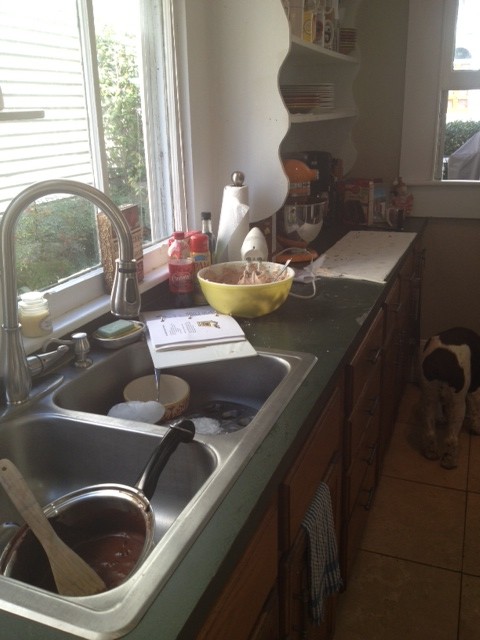
I just read that over 362 billion Oreos have been sold since they first came out in 1912.  That statistic is very relieving since I thought that I might be partially responsible for a decent percentage of their sales.  Clearly, with that many sold- I am not.  However, it just proves that there are many out there like me that really love Oreos.  Walker has a theory that men like the cookie part better and women like the cream part more.  This is true in our household, but maybe we need a wider basis for this theory to have any validity.  Walker would love to know, and for an easy science fair project at a later date, I would like to know as well.  Because they are the best selling cookie out there and oh so delicious, I had never thought to try to recreate its goodness.  While I doubt I can improve upon its perfection, what’s the harm in trying.  I could maybe sell 400 billion of my new Oreo if my kitchen were big enough.  However, here is a picture of my workspace, so maybe not. 

Homemade Oreo Cookies

Ingredients:

For the Dough:1 1/3 cups Dutch-process cocoa powder
1 1/2 cups all-purpose flour, plus more for dusting
1/4 teaspoon salt
2 sticks unsalted butter, softened
2 cups granulated sugar
2 large eggs
1 teaspoon vanilla extractFor the Filling:1 stick unsalted butter, softened
1/2 cup vegetable shortening
3 cups confectioners’ sugar, sifted
1 teaspoon vanilla extract

Directions:

Prepare the dough: Sift together the cocoa powder, flour and salt in a large bowl.Using a mixer, cream the butter and sugar. Add the eggs one at a time, then the vanilla, incorporating each ingredient before adding the next. Add the dry ingredients and mix just until incorporated, scraping the bottom of the bowl with a rubber spatula.

Divide the dough into 2 pieces; place one piece between 2 lightly floured sheets of parchment paper and roll into a 1/4-inch-thick rectangle. Repeat with the other piece of dough. Refrigerate both rectangles, covered with the parchment sheets, until firm, at least 1 hour or up to several days.

Using a 2-inch round cutter, cut the dough into 64 circles. (You can reroll the scraps once.) Place the cookies about 2 inches apart on ungreased baking sheets and chill for 20 minutes. Preheat the oven to 325 degrees.

Bake the cookies until they are set and slightly darker around the edges, about 20 minutes. Cool completely on wire racks.

Meanwhile, prepare the filling: Using a mixer, cream the butter and shortening until fluffy. Beat in the confectioners’ sugar and vanilla.

Flip half of the cookies upside down and top each with 1 level tablespoon of filling. Press the remaining cookies on top to make sandwiches.

A Fresh Twist on Salsa

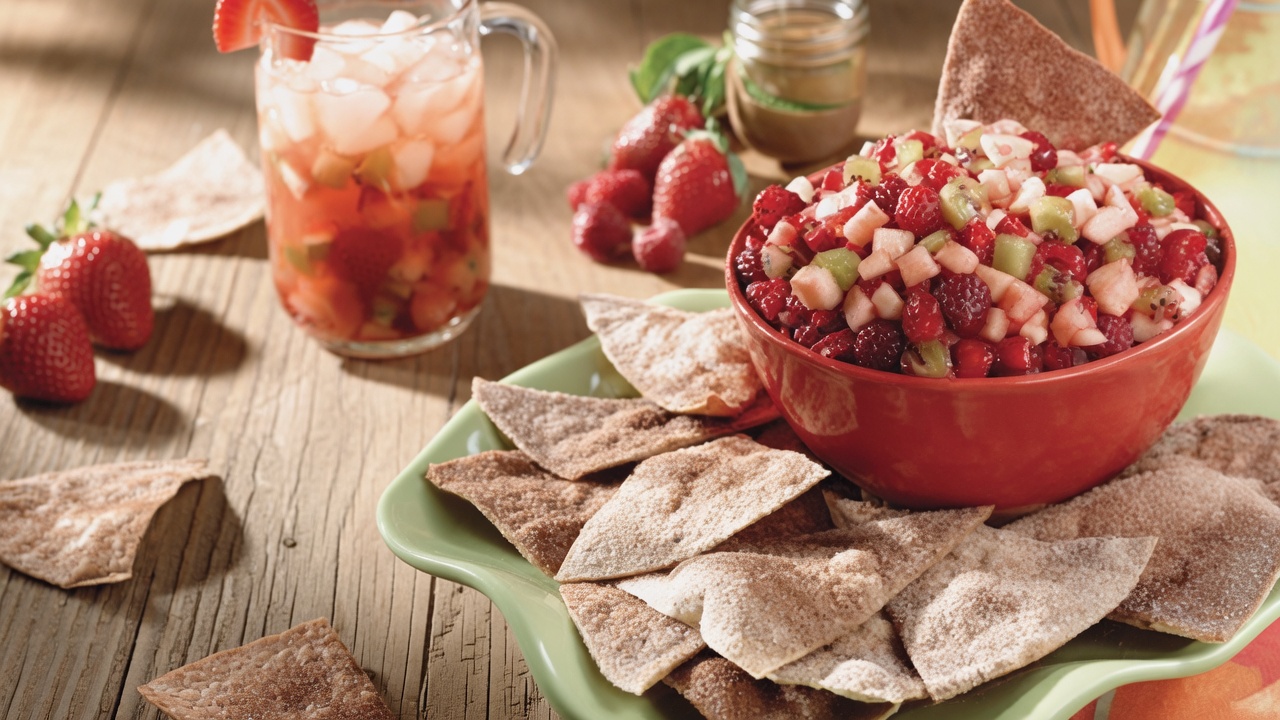
I was at the grocery store yesterday with Walker, and he was lamenting the fact that they never have his favorite fruit- Saturn peaches of course.  I told him that they were not in season to which he responded, “Well let’s just go get ice cream then.”  Which actually made perfect sense to me, so that is what we did.  It got me thinking about what fruits are in season, and I had actually been over to my brother and sister-in-law’s house for dinner last weekend, and they served an amazing lemon pound cake with fresh strawberries they had picked that day out at Ambrose Farm.  The strawberries were delicious, and while you can get strawberries year round at the grocery store, they are always so much better when they are in season.  I started googling strawberry recipes and found this one for fruit salsa and cinnamon chips.  It looks like the perfect addition to spice up brunch, and you can change it up for whatever fruit is in season.

Fruit Salsa and Cinnamon Chips

Ingredients:

2 kiwis, peeled and diced
2 Golden Delicious apples – peeled, cored and diced
8 ounces raspberries
1 pound strawberries
2 tablespoons white sugar
1 tablespoon brown sugar
3 tablespoons fruit preserves, any flavor
10 (10 inch) flour tortillas
butter flavored cooking spray
2 tablespoons cinnamon sugar

Directions:

In a large bowl, thoroughly mix kiwis, Golden Delicious apples, raspberries, strawberries, white sugar, brown sugar and fruit preserves. Cover and chill in the refrigerator at least 15 minutes.
Preheat oven to 350 degrees F (175 degrees C).
Coat one side of each flour tortilla with butter flavored cooking spray. Cut into wedges and arrange in a single layer on a large baking sheet. Sprinkle wedges with desired amount of cinnamon sugar. Spray again with cooking spray.
Bake in the preheated oven 8 to 10 minutes. Repeat with any remaining tortilla wedges. Allow to cool approximately 15 minutes. Serve with chilled fruit mixture.

A Wonderful Weekend

In addition to the Wine & Food Festival which kept Charleston in good eats all weekend, Corby and I got engaged!  Which now of course means I need suggestions on food and recipes to serve at the wedding.  Not one for long engagements, April 20th is the day- yes of this year.  I know most people focus on the dress, flowers, music, and of course the list- but we have all that done.  It might turn out to be a disaster, but I want to make our cake- this is what I am focused on.  While I have clearly made lots of cakes before and they have turned out well, decorating a cake- especially a wedding cake is not my great forte.  But I figure, as long as it tastes good, I can cover it with flowers and that should make it look pretty enough.  So onto a wedding cake recipe.  I found this recipe for a Butter Cake- what could be wrong with a Butter Cake?  My thought is to make two 9 inch cakes with a filling and then two 6 inch cakes with filling for a small 2 tier cake.  The filling that I want to try is a vanilla custard, and found a great recipe for that- see below.  And then of course, what kind of icing to use- I think butter cream to go with a butter cake of course!  I will be attempting to make a test cake this weekend with all of these recipes.  Stay tuned to see how it turns out, and clearly the picture is how I assume it will turn out!  Any suggestions, tips, etc are incredibly welcome!!  Should be a piece of cake right- haha!

Butter Cake

(from www.wilton.com)
Ingredients:

1 1/2 cups butter, room temperature

2 1/2 cups granulated sugar

5 eggs

1 teaspoon pure vanilla extract

3/4 teaspoon no color almond extract

3 cups all-purpose flour

3/4 teaspoon baking powder

1/4 teaspoon salt

1 cup milk

Directions:

Preheat oven to 350°F. Spray pans with vegetable pan spray, or use Cake Release.

In mixer bowl, cream butter and sugar until light and fluffy. Add eggs one at a time, mixing well after each addition. Mix in vanilla and almond flavor. Mix flour with baking powder and salt. Add flour mixture alternately with milk, starting with the flour; mix well. Pour into prepared pans. (for me- two 9 inch pans and two 6 inch pans)

Bake the 6 inch pans for 25-30 minutes and the 9 inch pans for 30-35 minutes

Cool 10 minutes in pan. Loosen sides and remove. Cool completely before decorating.

Vanilla Custard Filling

(from www.wedding-cakes-for-you.com)

Ingredients:

2/3 cup granulated sugar
2 Tablespoons cornstarch
2 tablespoons all purpose flour
pinch of salt
4 large egg yolks or 2 whole eggs
2 cups milk
1 vanilla bean or 2 teaspoons of vanilla extract
2 Tablespoons unsalted butter

Directions:

On a piece of plastic wrap , or in a small bowl, combine the sugar, cornstarch, flour and salt. In a saucepan combine and whisk together the egg yolks and milk, or whole eggs if you are using them.

Gather the corners of the plastic wrap, or the bowl and pick up the starch mixture, pour it on top of the eggs and milk and whisk well to be sure that all of the cornstarch and flour are dissolved.Add the vanilla bean. (if using the extract add it at the end of the recipe.

Set the pan over moderate heat and cook the custard for about 12 minutes, until thickened and brought to a boil. To do this stir on and off for the first 5 minutes, then stir constantly for 7 minutes longer until the cream really thickens and reaches a boil.

Remove pan from the heat. The cream is done when smooth and thick enough to leave a clearly defined line when you draw your finger through the cream coating the back of the spoon.

Remove the vanilla bean, rinse it, and set it aside to re-use. If you are using extract instead of the bean add it now. Add the butter and whisk until melted and blended in.

Pour the cream through a sieve into a bowl. Stir in any additional flavoring if using it. To prevent a film from forming on top of the cream, press a piece of plastic wrap onto the surface. Cool cover and refrigerate until ready to use.

Butter Cream Icing

(from www.smittenkitchen.com)

Ingredients:

For a wedding cake (or most of one, depending on the size)
2 cups of egg whites (approx. 12 large)
3 cups sugar
5 cups butter, softened (2 1/2 pounds, 10 sticks)
1 tablespoon vanilla extract

For a 9-inch cake (plus filling, or some to spare)
1 cup sugar
4 large egg whites
26 tablespoons butter, softened (3 sticks plus 2 tablespoons)
1 teaspoon vanilla extract

Directions:

Whisk egg whites and sugar together in a big metal bowl over a pot of simmering water. Whisk occasionally until you can’t feel the sugar granules when you rub the mixture between your fingers.

Transfer mixture into the mixer and whip until it turns white and about doubles in size. (Here’s a tip: when you transfer to the mixer, make sure you wipe the condensation off the bottom of the bowl so that no water gets into the egg whites. This can keep them from whipping up properly.)

Add the vanilla.

Finally, add the butter a stick at a time and whip, whip, whip.

 

The Oscars and Brownies

I did not stay up to watch the Oscars.  I wanted to, and I planned to, but I fell asleep putting Walker to bed.  To be honest, I really haven’t seen many of the movies that were nominated, so I wasn’t totally invested.  But I really do love watching the Red Carpet and all of the glamor that goes along with it.  My favorite part usually is when they do a montage of all the past Oscar winners and movies, there are just so many great ones.  I came across a blog this morning called The History Kitchen– it is fantastic.  There is a post about Katherine Hepburn and her favorite brownie recipe.  Here is a link to the post http://www.pbs.org/food/the-history-kitchen/katharine-hepburn-brownie-recipe/.  She was such an amazing woman- outspoken, beautiful, intelligent, and witty, and I am thrilled to have found this blog and this recipe.  So, in honor of last night’s Oscars, here is Katherine Hepburn’s favorite brownie recipe.

Chocolate Brownies

Ingredients:

½ cup cocoa or 2 squares (2 oz.) unsweetened baker’s chocolate
1 stick (1/2 cup) unsalted butter
1 cup sugar
2 eggs
1/4 cup flour
1 teaspoon vanilla
Pinch of salt
1 cup roughly chopped walnuts or pecans

Directions:

Melt butter with the cocoa or chocolate together in a heavy saucepan over medium low, whisking constantly till blended. Remove from heat and stir in the sugar. Whisk in the eggs and vanilla. Stir in flour, salt and walnuts. Mix well. Pour into a well buttered 8-inch square baking pan. Bake at 325 degrees for about 40 minutes till a toothpick inserted in the center comes out clean. Cool completely and cut into squares. These brownies are very fudgy and may be somewhat difficult to slice cleanly; use a sharp knife and a spatula to help them loosen from the baking dish.

Winter Fun and Vanilla Ice Cream

We had the best time in the mountains with friends this past weekend.  With 8 kids, 6 adults and 2 snow storms it was definitely a little chaotic, but the kids had a great time sledding and building snowmen, and the adults had an even better time sitting by the fire eating and drinking.  The weather could not have been better- snowing then turning very warm and then snowing again.  Walker, Corby and I got one day of skiing in where Walker tackled his first black diamond and skied it like a champ.  We had amazing dinners of salmon one night, spaghetti the next and finished off the weekend with delicious steaks on the grill. It only took us two days to realized that 8 children require paper plates and cups especially since for some reason, the dishwasher up there literally takes 4 hours to run.  The last night we had a pinata for the kids and completely jacked them all up on candy and then expected them to stay downstairs and play quietly- obviously that didn’t happen, so we charged them with coming up with a play to put on for us.  This was a brilliant plan since it occupied them for a good hour and a half, and while the play was one of the weirdest and most discombobulated things I have ever seen- it was a riot, and they should all be on Broadway. After the play, they were all begging for ice cream, and since we were leaving the next day and the ice cream probably wouldn’t make the 5 hour drive back to Charleston, we relented, and then I made the mistake of promising them ice cream for breakfast as well.  While fixing the ice cream for breakfast the next morning, all 8 children could not have been happier with plain vanilla ice cream.  Sometimes there is nothing better.  It got me thinking that next time, we should bring an ice cream maker, and they could make their own ice cream.  I found this great recipe for vanilla ice cream and once I get an ice cream maker, I can’t wait to try it!

Vanilla Ice Cream

Ingredients:

2 cups heavy whipping cream

2 cups half-and-half cream

3/4 cup white sugar

1 tablespoon vanilla extract

Directions:

In a large bowl, combine the heavy cream and the half and half. Gradually whisk in the sugar until blended.  Whisk in the vanilla. Refrigerate, covered, until very cold, at least 3 hours or as long as 3 days. Whisk the mixture to blend and pour into the canister of an ice cream maker. Freeze according to the manufacturer’s directions. Eat at once or transfer to a covered container and freeze up to 8 hours.