Tag Archive for: baking

Pinterest and Cheesecake Strawberries

I admit that I am pretty slow to the game when it comes to new social media technology.  I am terrified of this new facebook layout and won’t even look at friends pages that have the new layout because I don’t understand it.  I don’t twitter or tweet or whatever you call it even though I probably should.  And until literally five minutes ago, I had heard of pinterest, but hadn’t ever looked at it.  Well I just did, and this is one of the first things I saw!   What is this amazing little treat???  It was put up by The Sweets Life (www.thesweetslife.com).  It sounds easy, delicious, and looks fancy- YAY!!  These are the directions I copied from the Sweets Life website- which I clearly need to read a lot more of!


Cheesecake Strawberries

Ingredients:
-1 lb large strawberries
-8 oz. cream cheese, softened (can use 1/3 less fat)
-3-4 tbsp powdered sugar (4 tbsp for a sweeter filling)
-1 tsp vanilla extract
-Graham cracker crumbs

Directions:

1. Rinse strawberries and cut around the top
of the strawberry. Remove the top and clean out with a paring knife, if
necessary (some may already be hollow inside). Prep all strawberries and set
aside.
2. In a mixing bowl, beat cream cheese, powdered sugar, and vanilla
until creamy. Add cream cheese mix to a piping bag or ziploc with the corner
snipped off. Fill strawberries with cheesecake mixture. Once strawberries are
filled, dip the top in graham cracker crumbs. If not serving immediately,
refrigerate until serving.

So, while I am still a complete novice at pinterest (I am actually waiting for an invitation to join), I am intrigued by what might be on this site or did I just find the best thing right off the bat?  Can’t wait to make these!

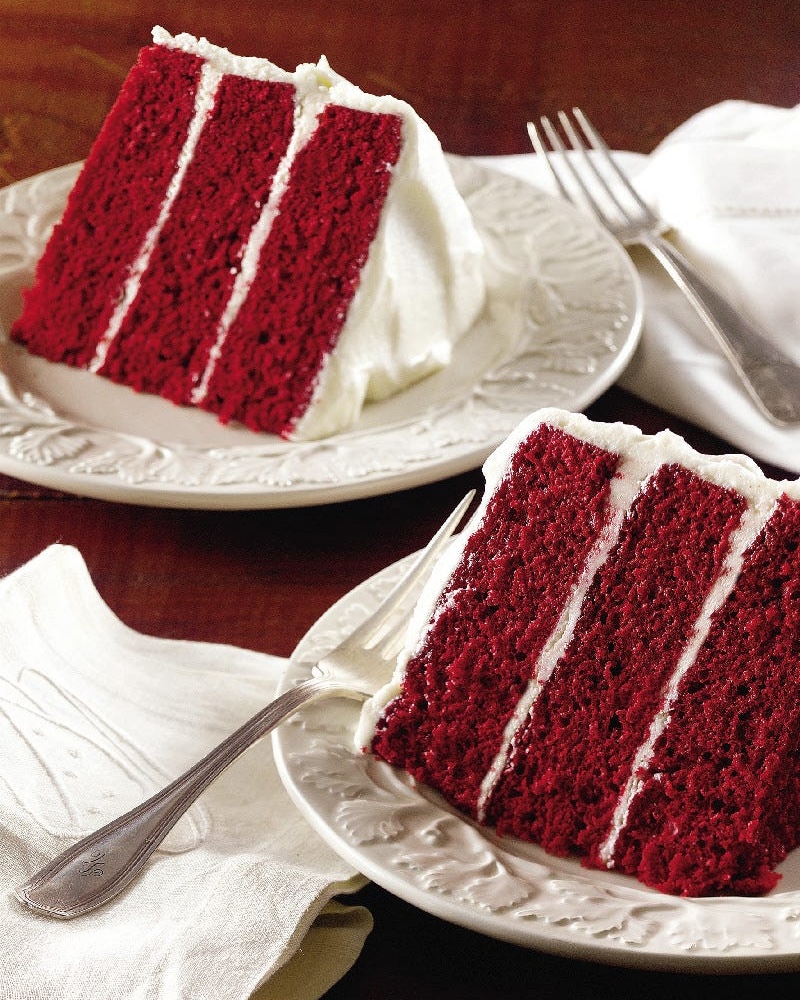
The Secret to a Red Velvet Cake??

I made Red Velvet Whoopie Pies last night to take as dessert to a dinner party.  The recipe was a very simple recipe for the red velvet part- a box of cake mix, eggs, water and oil.  I made two different fillers: a marshmallow and a cream cheese icing.  Everything went very well, and they looked beautiful- I had rolled them in mini chocolate chips and red hots- it was just a fun dessert to make.  Then Corby came home.  And he tried one. And it was bad.  Corby loves red velvet cake, and as this was my first attempt to make this, I was pretty excited for him to try it and love it and think that I was the best baker in the world.  Needless to say, very disappointed.  What went wrong??  I, of course, tried one as well, and Corby was not lying- they were bad despite how pretty they looked.  Fortunately, I had enough time to make a Cheerwine Cake, which is always good.  So, my goal this weekend is to find and make a good red velvet cake.  I am not going to use a box mix because that clearly didn’t work.  The standard recipe that I am finding online seems to be:


Red Velvet Cake

  • 2 cups sugar
  • 1/2 pound (2 sticks) butter, at room temperature
  • 2 eggs
  • 2 tablespoons cocoa powder
  • 2 ounces red food coloring
  • 2 1/2 cups cake flour
  • 1 teaspoon salt
  • 1 cup buttermilk
  • 1 teaspoon vanilla extract
  • 1/2 teaspoon baking soda
  • 1 tablespoon vinegar

There is some variations in the amount of baking soda and vinegar and cocoa powder, but I am going to be a master of this by Sunday so stay tuned!!

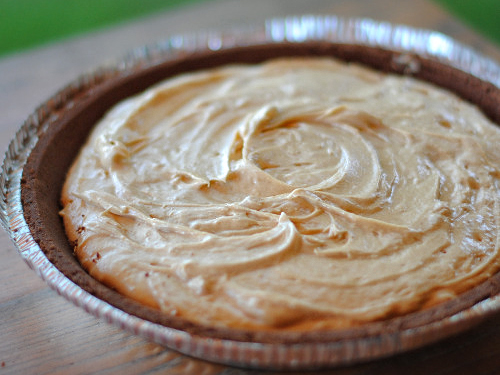
Peanut Butter Pie Fail

I love The Local Palate (www.localpalatemag.com), the new cooking/food magazine in Charleston.  Yesterday, they put up a link to all of their recipes http://www.localpalatemag.com/recipes.html, and I tried the Peanut Butter Pie recipe.  You know those days in the kitchen where everything goes wrong- you drop eggs on the floor, you burn butter, your flour explodes everywhere into a disastrous mess- that was pretty much my experience with trying to make a Peanut Butter Pie.  You know when you have those days, and despite all the mess and frustration, your dish turns out marvelously- well, that didn’t happen.  Ok- here is the recipe from the Local Palate-

Peanut Butter Pie

Ingredients:

2 cups peanut butter, smooth or chunky
1 pound cream cheese
¼ cup powdered sugar
1 pint heavy cream
1 vanilla bean, split and seeded
3 large egg yolks
1 Oreo cookie prepared pie shell
4 tablespoons peanuts, toasted
4 ounces shaved bittersweet chocolate

Directions:

In a mixing bowl, whip together peanut butter, cream cheese, and powdered sugar.

Pour cream into a second mixing bowl or stand mixer. Whip cream with vanilla bean seeds to stiff peaks.

Fill bottom of double boiler with water and place on medium-high heat on the stove. Place egg yolks in top of double boiler and lightly temper egg yolks until slightly thickened, stirring constantly. Remove from heat and let come to room temperature.

Fold eggs into peanut butter mixture.

Fold in whipped cream with peanut butter mixture. Combine thoroughly.

Pour mixture into prepared Oreo pie shell. Top with peanuts and shaved chocolate. Place in freezer for 2 hours. Use a warm knife to serve.

Now- here is what went wrong.  First of all- I could not find an Oreo pie shell as the store, so no big deal, I got a chocolate pie shell. Next, I decided to use my stand mixer to mix the heavy cream and my hand mixer to mix the peanut butter, cream cheese and powdered sugar together.  Bad idea.  Perhaps I might have used too small of a bowl, but mixing cream cheese, peanut butter and powdered sugar is not so easy- but mess aside- got it done.  Now to the heavy cream and the seeds of a vanilla bean.  I got some of the seeds out and the rest all over me, so I added some vanilla extract, but despite the work to get the seeds- my heavy cream did not whip… at all.  It just stayed very milky and spraying everywhere.   A phone call to my mother informed me that even though the recipe said heavy cream, I should have bought heavy whipping cream or just whipping cream and fortunately she had some at her house.  In the mean time, I did not have a double boiler for the egg yolks- it took five attempts to get the three yolks needed.  Not only that, but in my homemade double boiler of two pots on top of each other, are you supposed to have the bottom pot boiling before you put on the eggs- I don’t know, but I did not have the water boiling before I added the eggs, so I am not sure if the eggs turned out correctly.  I took the eggs off of the stove to let them get to room temperature and rode my bike over to my mother’s to get her whipping cream.  She only had 1/2 a pint, but it whipped beautifully, so I then added half of mine that I had been mixing for 15 minutes to no effect.  Well, of course that diluted the whole mixture but I added it and the eggs to the peanut butter mix anyway.  This part all went ok- and I put it in the pie shell and froze it and it looked very pretty.  It really didn’t taste very good, and it wasn’t that it was horrible by any means, but just not great.  I don’t know if it was the eggs or the bad heavy cream or what, but if I was to attempt this again, I would get some good whipping cream, and I would cut the amount of cream cheese in half as it was a very strong flavor and kind of hid the peanut butter flavor, and I would double the amount of powdered sugar to 1/2 a cup.  I think you could do this without messing up the recipe too much as I had a ton of the pie filling left over.  I will say the chocolate pie crust was very tasty, and if you can’t find oreo- this works just as well!  Here’s to feeling like a complete beginner in the kitchen again!!

Ham and Cheese Crepes and a hike to Babel Tower

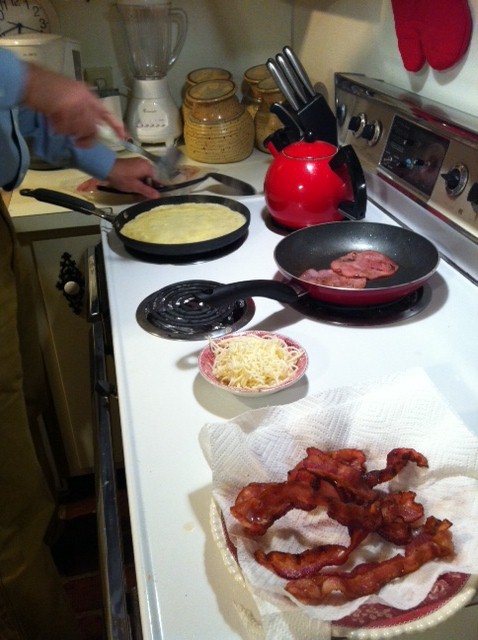
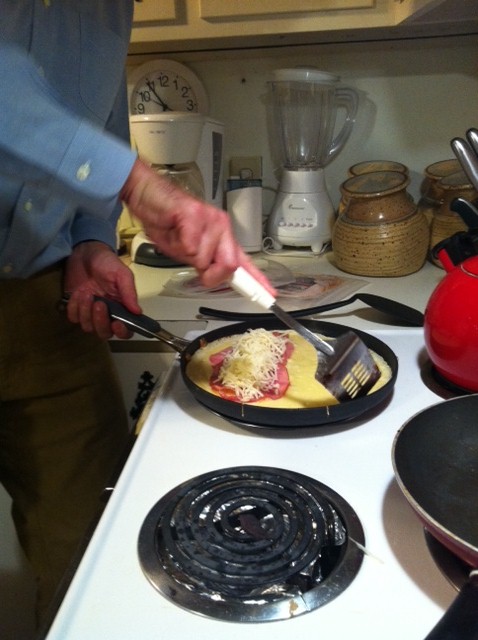
I can’t believe that Christmas has come and gone already.  I hope everyone had a wonderful holiday!  Corby and I went up to the mountains in North Carolina since it is Walker’s year to spend Christmas with his dad 🙁  While we missed Walker tremendously, we had such a relaxing great time just the two of us.  For your sake, I am going to break this up into two posts because I would just ramble and ramble and the post would be too long for anyone to read, and of course you don’t want to miss anything.  So, the first night we got up to Linville, we made ham and cheese (yum) crepes.  A friend had made these for us when we were in NYC a few weeks ago, and they were amazing- we had to try them ourselves.  Our technique needs some working on, but they sure tasted good and were surprisingly easy.

Ham and Cheese Crepes

Ingredients:

1 cup all-purpose flour

2 eggs

1/2 cup milk

1/2 cup water

1/4 teaspoon salt

2 tablespoons butter, melted

ham

grated mozzarella cheese


Directions:

In a large bowl, mix together the flour and the eggs. Gradually add in the milk and water, and then add the salt and butter and mix until smooth.

Heat a lightly oiled  frying pan over medium high heat. Ladel the batter onto the griddle, using approximately 1/4 cup for each crepe. Tilt the pan with a circular motion so that the batter coats the surface evenly.

Cook the crepe for about 2 minutes, until the bottom is light brown. Add in as much ham and grated cheese as you like. Loosen with a spatula and flip half of the crepe on top and then flip to cook the other side. Serve hot.  This is where our technique left something to be desired as it is a little tricky.  Make sure the frying pan is HOT.

These really were so easy and so good, and I think they come off as pretty impressive.

The next day, we went on a great hike down into the Linville Gorge to a swimming hole called Babel Tower- we didn’t swim.  But it was so beautiful, and in the summer, it is a great place to go.  There are several different places to jump off- very low places for me, and there is about a 20-foot jump which scares me to death, but is super fun for Walker.  Here are some pictures.    Tomorrow, I will post recipes about our Christmas day feast of Rommegrot and Canadian bacon strata and our hike up the profile of Grandfather Mountain- too fun!

Gingerbread House Party

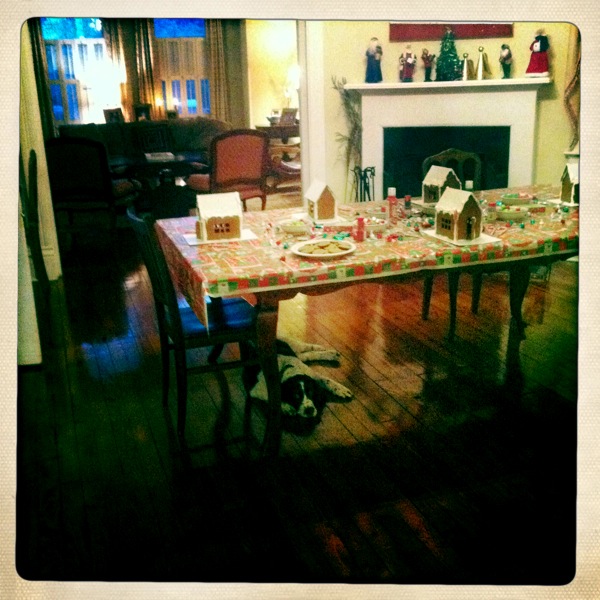
We went to my sister’s gingerbread house party in New York last weekend, and Walker was so disappointed that he couldn’t take his gingerbread house on the plane home, we decided to have a gingerbread house party as well.  Thanks to my mother’s genius when she was making houses for my sister’s party, she made five extra, because who doesn’t need extra gingerbread houses lying around?  There were so many great things about this party.  The first was that the only thing I had to do was buy the candy.  I can do that.  I can do that well.  The only problem there is making sure all of the candy actually gets home.  Here is the candy set up.

The second great thing about this party was the three families we had come over to help us decorate the houses.  Two of the families are very old friends of mine who I have know since I was born practically, and we all three went from 1st through 12th grade together, and that includes boarding school in Connecticut.  We had grown up decorating gingerbread houses together as children, and it was so much fun to watch our own children start this tradition for themselves.

The third thing I loved about this party was where my sweet old dog, Nemo, positioned himself.  Now, since I didn’t actually have to do anything for this party other than buy the candy, and since I am currently at my real job without my mother’s recipe book in front of me, I can’t post at this time the recipe for gingerbread houses, but I will do an update this afternoon when I get home.

I might be biased, but I think these four gingerbread houses are the best gingerbread houses ever to be built.  It is such a fun Christmas activity to do with children, and so much fun to eat after!

Update: Of course my wonderful mother sent me the recipe as soon as she read this!!

Gingerbread House/Men

 Cream:
¼ cup butter
½ cup sugar
½ cup dark molasses

 Sift:
3 ½ cups unbleached flour
½ tsp. salt
½ tsp. cloves
2 tsp. cinnamon
2 tsp. ginger
2 tsp. nutmeg
1 tsp. baking soda

Add dry ingredients to the butter- sugar mixture alternately withabout ¼ – ½ cup water, or enough to be able to roll out the dough. Cut into shapes for a house or into Gingerbread men and bake on doubled, or even tripled layers of waxed paper. Bake at 350 for 10-15 minutes.

Icing Cement

Mix 3 egg whites at room temperature until they are very peaked and dry. Slowly add one box of powdered sugar.

Spiced Eggnog Pound Cake

I hope everyone had a fabulous Thanksgiving!  I am still so full, but it was all worth it.  I remade a lot of recipes that I have put on this blog this past week for family members that I have not seen in a while.  We started off on Wednesday night, having my parents, all of my siblings and nieces over for dinner.  Corby served up his now-famous BBQ with coleslaw and a potato and bacon hash that was out of this world.  I made a salad and used the Pimento Cheese pop-overs instead of croutons.  Since we were having BBQ, my brother and his wife brought Bourbon Banana Pudding- I don’t have the recipe yet, but apparently it is from Joy of Cooking, and it was so so so good.

The next day,  I made the Prosciutto Cheese Straws for a pre-Thanksgiving dinner snack- fantastic and a huge hit with my brother and father, and for Thanksgiving Day dessert, I made the Chocolate Bread Pudding that was the Le Creuset recipe contest winner, and it was just as good as I remembered it!  We also got an Apple Crisp from The Co-Op on Sullivan’s Island (www.thecoopsullivans.com).  The Co-Op is a great little grocery/deli that serves up great sandwiches and amazing homemade desserts- definitely check it out!

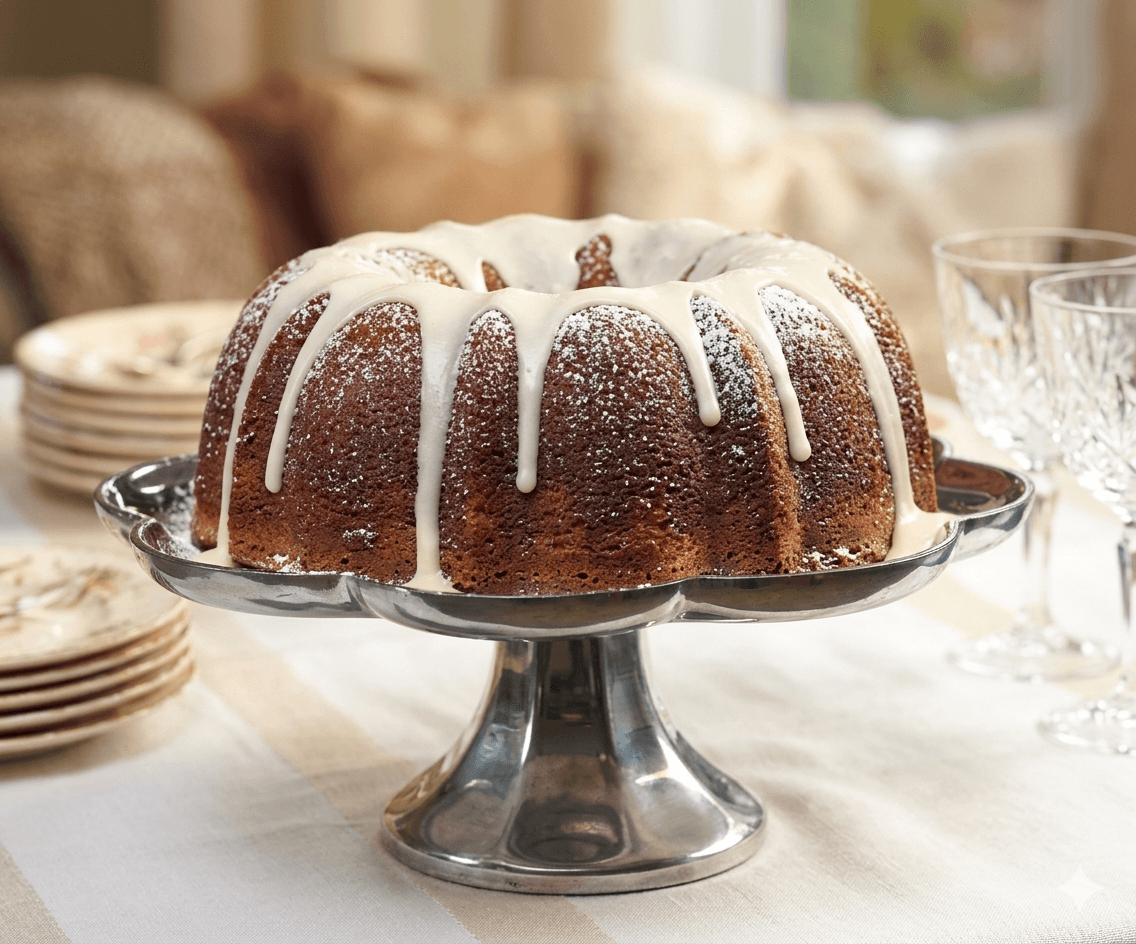
So despite the fact that it is 80 in Charleston today, I am now gearing up for Christmas- how is that possible!!!  We are headed to NYC this weekend for a visit, and I am so excited to get some cold weather to get into the Christmas spirit.  We are also going to my sister’s annual gingerbread house building party on Sunday, before we head home, which we have not been to in a long time and should be so fun!  To also help get into the Christmas mode, here is a recipe I love from Christmas with Southern Living from back in 2005- Spiced Eggnog Pound Cake- enjoy!

Spiced Eggnog Pound Cake

Ingredients:

  • 1 cup butter, softened
  • 3 cups sugar
  • 6 large eggs
  • 3 cups sifted cake flour
  • 3/4 teaspoon baking powder
  • 1/2 teaspoon salt
  • 1 cup eggnog
  • 2 teaspoons vanilla extract
  • 2 tablespoons brandy (optional)
  • 1 teaspoon ground cinnamon
  • 3/4 teaspoon freshly grated nutmeg
  • 1/2 teaspoon ground allspice
  • 1/4 teaspoon ground cloves
  • Powdered sugar
  • 1 cup sifted powdered sugar
  • 2 tablespoons plus 1 teaspoon whipping cream

Preparation

  • Generously grease and flour a 12-cup Bundt pan; set aside.
  • Beat butter at medium speed with an electric mixer about 2 minutes or until creamy. Gradually add granulated sugar, beating 5 to 7 minutes. Add eggs, 1 at a time, beating just until the yellow disappears.
  • Combine flour, baking powder, and salt. Add to butter mixture alternately with 1 cup eggnog, beginning and ending with flour mixture. Beat at low speed just until blended after each addition. Stir in vanilla and, if desired, brandy.
  • Pour half of the batter into the prepared pan. Stir cinnamon and the next 3 ingredients into the remaining batter. Spoon spice batter over plain batter. Swirl batters together, using a knife.
  • Bake at 350° for 50 to 55 minutes or until a long wooden pick inserted in the center comes out clean. Cool in the pan on a wire rack for 15 minutes. Remove from pan; cool on a wire rack.
  • Place cake on a cake plate; dust with powdered sugar.
  • Combine 1 cup powdered sugar and whipping cream, stirring until smooth. Drizzle glaze over the cake


The Gateway to Bourbon Country:
Blue Cheese and Toasted Walnut Crostinis with Kentucky Sweet Sorghum

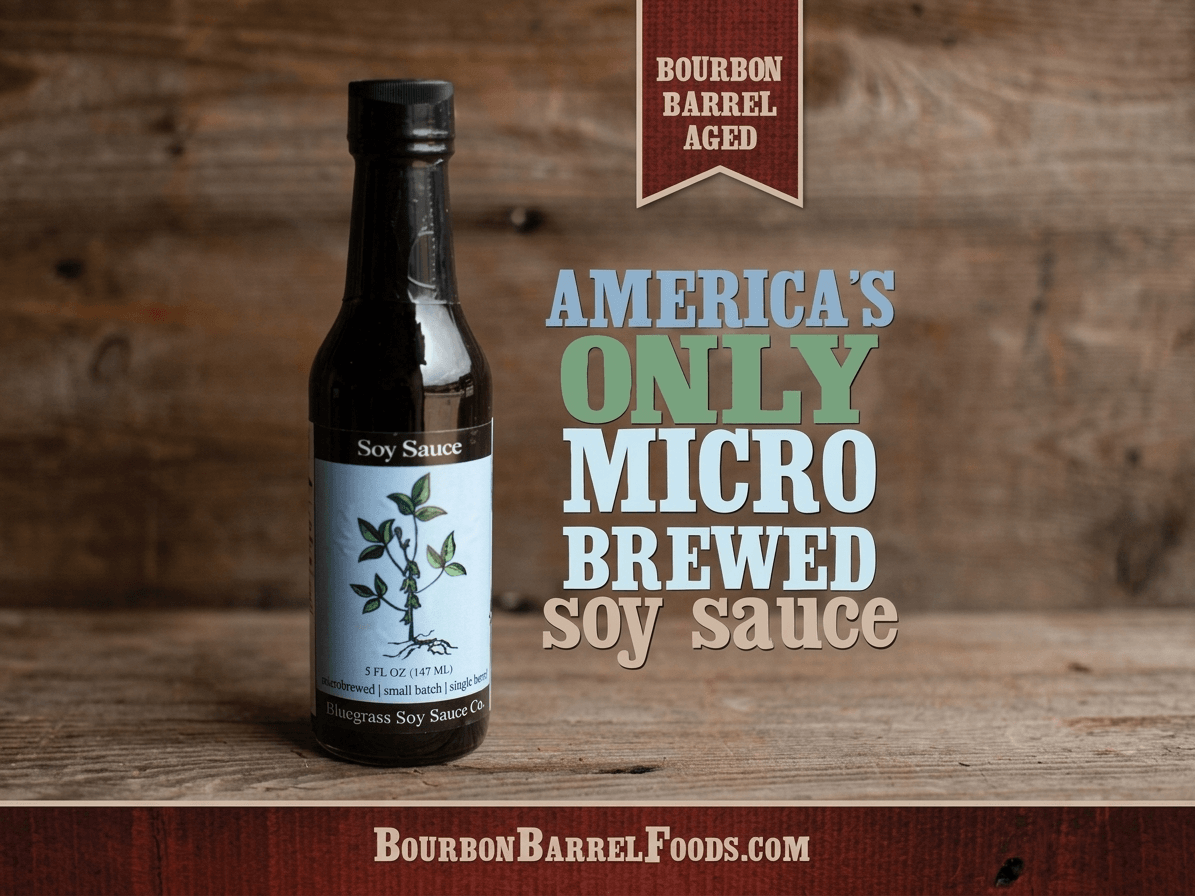
I was searching for new fun recipes when I came across this website www.bourbonbarrelfoods.com, and what isn’t fun about bourbon?  Here is a little bit about the company from their website:

Bourbon Barrel Foods is a maker of gourmet food products that reflect the rich heritage of Kentucky’s Bourbon Country, “The Napa Valley of the Bluegrass.”  Our philosophy is to make quality gourmet sauces and seasonings by adhering to a three-word philosophy: slow, small, simple.  From the farmer in southern Kentucky who grows the soybeans for our naturally fermented, small-batch soy sauce, to the grower in Eastern Kentucky who harvests the sorghum we use as a sweetener, we have a hands-on approach that requires us to search for the best the state has to offer and develop relationships with the farmers who get great satisfaction seeing their crops grow from the seed to the shelf.

Bourbon Barrel Foods is located in Louisville, Kentucky.  The Gateway to Bourbon Country.

Fantastic!!  What’s even better is that they have recipes on their site that look amazing.  I am going home this afternoon to make this one!!

Blue Cheese and Toasted Walnut Crostinis
with Kentucky Sweet Sorghum

Ingredients
6 to 8 oz crumbled blue cheese
2 oz walnut pieces
Bourbon Barrel Foods brand Kentucky Sweet Sorghum
1 baguette sliced into rounds

Directions

Preheat oven to 375
Mix cheese and nuts and
portion onto bread rounds
Drizzle sorghum on top and toast until melted and slightly browned
Garnish with fresh herbs or fruit
Can be served warm or at room temp
Should keep 2 days in sealed container

I am in love with this ad!


Those Southern Staples – Biscuits and Cornbread

Thanks so much to the wonderful site Vegan Bliss from the Organic Goddess – promoting Veganism in Atlanta – this is new southern baking!

(originally published March 2002, in Co-options, the newsletter of Sevanada Natural Foods Cooperative in Atlanta, GA. http://www.sevananda.coop )
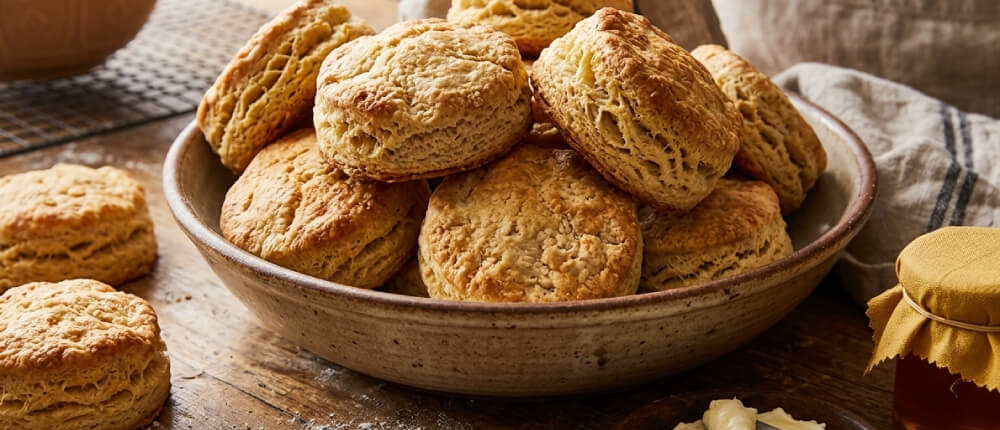
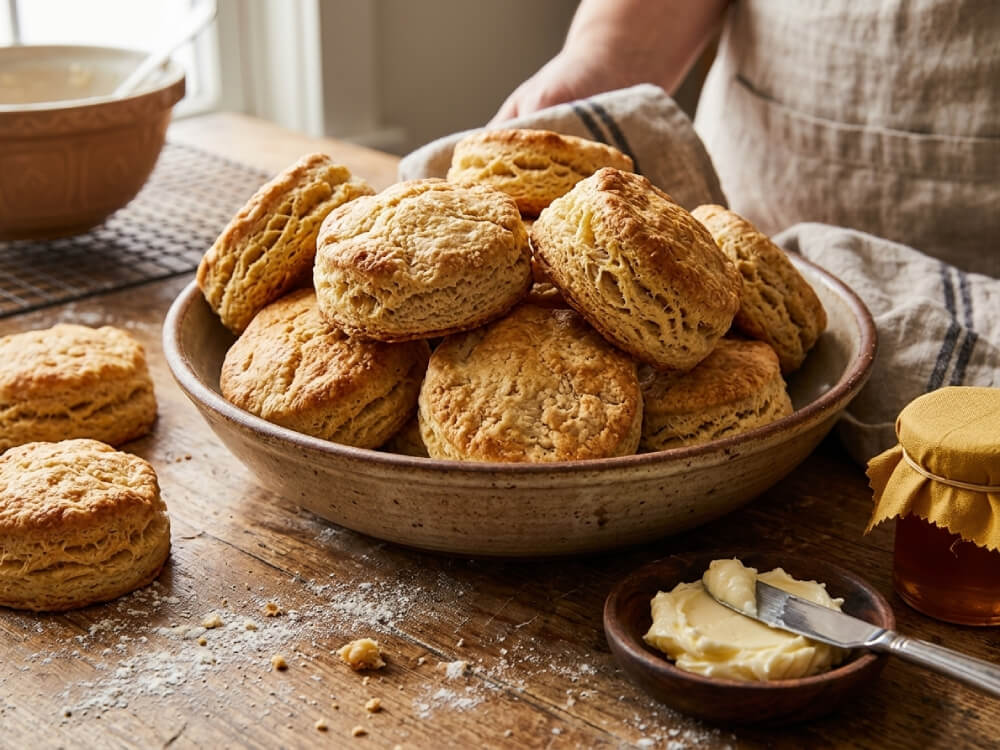
I come from a long, proud line of biscuit makers. My mother’s mother (Pansy) could make a pan of biscuits that you would swear could float off the plate. My mother (Jo) has always been convinced that her biscuits aren’t as good as Pansy’s, but they are. You find yourself reaching for the preserves just to have something to hold them down. Vegan biscuits were one of the things that I just had to get right, and now that I have, I’ll tell y’all the secrets.

Actually, making good biscuits isn’t hard; it’s just a matter of practice and keeping a few simple rules in mind. These are to a) choose a low gluten (low protein) flour, b) keep the ingredients cool or cold, c) handle the dough as little as possible, d) bake these items at a higher temperature than you might expect (400-450 F), and e) serve them hot – as soon as they’re ready. I usually try to make sure that everyone is seated at the table before I pull the pan out of the oven! (These rules also apply for scones, soda bread, and pie crusts.)

For those of you who are into the kitchen science thing – here are the reasons behind the rules:

a) Low gluten flour – This surprises a lot of people, since they’ve heard that high gluten flour is often called “bread flour”. What they don’t understand is that biscuits are not really “bread” in the classic sense – they are pastry. Look for flour that says “soft wheat” or “pastry flour”. “All-purpose” flour will be alright. Avoid “bread flour”. For truly light Southern-style biscuits, use a self-rising biscuit flour like White Lily. I don’t recommend this for everyday eating, of course, but biscuits are pretty high in fat, so I wouldn’t recommend them for everyday eating anyway.
b) Keep the ingredients cool – Pastry is often “short” or rich in shortening. Shortening is called that because it shortens the gluten strands in the flour, making the final product flaky and tender, rather than chewy like a yeast bread. In order to maximize the flakiness in your biscuits or other pastries, you want the fat (shortening) to remain in discrete units rather than melting into the flour. The small chunks of fat keep the flour layers apart and contribute to the overall flakiness of the product. I have cool hands, so I work my shortening in using my fingers during cool weather, but if your hands are warm, you’ll want to use a pastry cutter (which looks like a handle with a half-moon shaped set of wires or blades attached). If you leave your shortening in fairly large chunks, you’ll have very flaky biscuits, but they’ll fall apart. If you work all the shortening in until your flour resembles coarse cornmeal, your biscuits will be tender, but not flaky. For the best flaky-tender balance, work most of your shortening in until the flour looks like coarse corn meal, but leave a few pea-sized pieces of shortening as well.

I use a natural, non-hydrogenated, organic shortening made by Spectrum. Keep it cool, but not in the refrigerator. It gets soft at temperatures above 72F, but becomes almost unworkably hard below 60 F. Cool room temperature (68 F or so) keeps it at a perfect, workable texture.
c) Handle the dough as little as possible – This is related to the low-gluten flour rule. The protein in wheat is developed by kneading. When you are making a yeast bread, you want these sheets to develop so that they will trap the tiny bubbles of CO2 that the yeast gives off. That is what makes yeast bread rise, and gives it its distinctive chewy texture. If these gluten sheets are allowed to develop in biscuits, however, it makes them tough. Only knead your dough enough to incorporate all the dough into a mass. If this takes more than about 5 or 6 strokes, you need to add a bit more liquid.
d) Bake the biscuits at a high temperature – This allows the moisture in the biscuits to quickly turn into steam, which makes them puff up and gives them a lovely crust. Slower baking will make the biscuits tough, not light and crusty.
e) Serve them hot – while the steam is still escaping. It gives the biscuits that lighter-than-air quality.

Since St. Patrick’s Day is the 17th, I’m also including a simple vegan soda bread recipe. This one isn’t entirely traditional, since it includes both baking powder and baking soda, but it’s very tasty. Soda bread isn’t rich like biscuits, but all the same dough handling rules apply. I think of it as Irish hoecake!

The rules about high temperature baking and serving hot also go for cornbread, and I’ll include a recipe for that as well. My paternal grandmother (Theone) thought that it wasn’t a proper meal unless there were both cornbread and biscuits on the table. (Too bad her biscuits weren’t as good as Pansy’s!)

Old Fashioned White or Half-Whole-Wheat Biscuits

Recipe By: Lisa T. Bennett
Serving Size: 12
Preparation Time: 0:30

4 cups self-rising flour
1 cup Spectrum shortening
1 1/3 cups to 1 1/2 cups soymilk

Pre-heat oven to 450 F.

Cut shortening into flour until it resembles coarse meal with a few pea-sized pieces of shortening remaining. Mix in soymilk just until dough holds together. Press dough together lightly. Don’t overwork the dough or biscuits will be tough – 5 or 6 strokes should be enough or you should add more soymilk. It’s better to err on the side of too wet rather than too dry. Press dough out onto a floured board to 1/2 inch thick. Cut with a biscuit cutter or an old baking powder tin. Don’t twist the cutter! Doing so will cause the edges of the biscuits to seal and won’t allow them to rise properly. Bake in ungreased pan until lightly browned, 12 – 15 minutes.

Makes 12 medium-sized biscuits (enough for four moderately hungry adults).

—————
Notes: Placing the biscuits close together in the pan will cause them to rise up and will yield tall biscuits with soft sides (classic Southern biscuits). Leaving a little space between them with make them crusty all over and a bit shorter and wider. Using a larger cutter will give you what are often lovingly referred to as “cat-head biscuits” (the name simply refers to their size).

Don’t overbake the biscuits or they will lose their delicate flavor and become slightly bitter. They should be pale with light golden-brown highlights.

Variation: Half-Whole Wheat Biscuits. Substitute two cups plain unbleached flour and two cups whole wheat pastry flour for the self-rising flour. Add 4 teaspoons baking powder and one teaspoon salt to flour before cutting in shortening. These biscuits will be heavier than the white ones, but will have more fiber.

Another Variation: Substitute Earth Balance for Spectrum Organic Shortening for a more “buttery” flavor. Omit salt.

(For an all-whole-wheat biscuit recipe, see the March 2004 article “Down Home Cookin’ ”.)

Corn Bread

Recipe By: Lisa T. Bennett
Serving Size: 8
Preparation Time: 0:45

1 cup full-fat soy milk (unsweetened preferred, but regular okay.)
1 tablespoon apple cider vinegar
3/4 cup safflower or canola oil
1 1/2 cups cornmeal (white or yellow)
3/4 cup whole wheat pastry or unbleached all-purpose flour
1 tablespoon Ener-G egg replacer powder
2 teaspoons baking powder
1/2 teaspoon baking soda
1/2 teaspoon salt

Preheat oven to 450 F.

Mix soy milk and vinegar – let it sour. It will look lumpy and clabbered, like buttermilk.

Pour safflower oil into a cast-iron pan. Let it heat in the oven while you mix dry ingredients in a large mixing bowl. (If you don’t have a cast-iron pan, use an 8″ round cake pan or an 8″ X 8″ square pan.)

Pour oil into a well in the dry ingredients. Add the soured soymilk – mix quickly. Batter should be like thick cake batter. If too dry, add more soy milk (doesn’t have to be soured).

Pour batter in hot pan, place back in oven and bake until golden and crusty – about 20-25 minutes.
—————
Variations: add any or all of the following: a handful of corn kernels, diced red or green bell peppers, a tablespoon of diced jalapeños, or a teaspoon of diced or pureed chipotle peppers.


Pastriology

Now here’s a project we can get behind, considering it’s entirely based on pastry (both the good and the bad): “Pastriology,” a feature documentary by Alexis Krasilovsky.

SYNOPSIS:

Pastriology takes a global view of the perils and pleasures of pastry.  How can something that can make you sick and even kill you be such a sweet expression of cultural values and love?  Pastry is a luxury for some, a fast substitute for meals for others, and in today’s economy, it’s a comfort food for more and more Americans at a loss.  Pastriology addresses the planetary emergency of too little food, while seducing the viewer with the lavish traditions and beauty of pastry- and cake-making that call us back to the roots of our childhood.

For more information about the film, click here to visit the site.