Tag Archive for: cake

Huguenot Torte

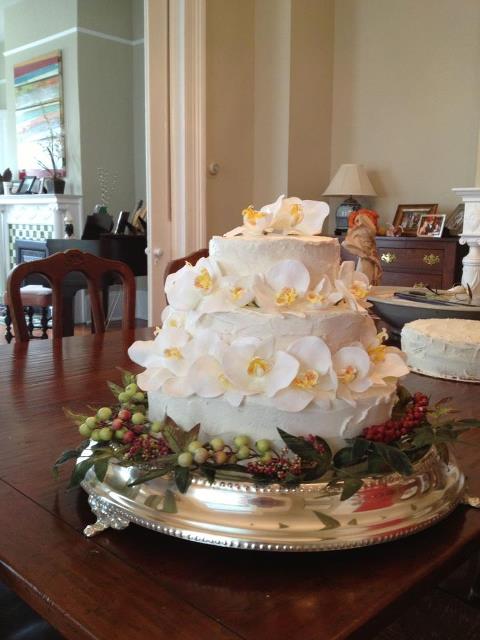
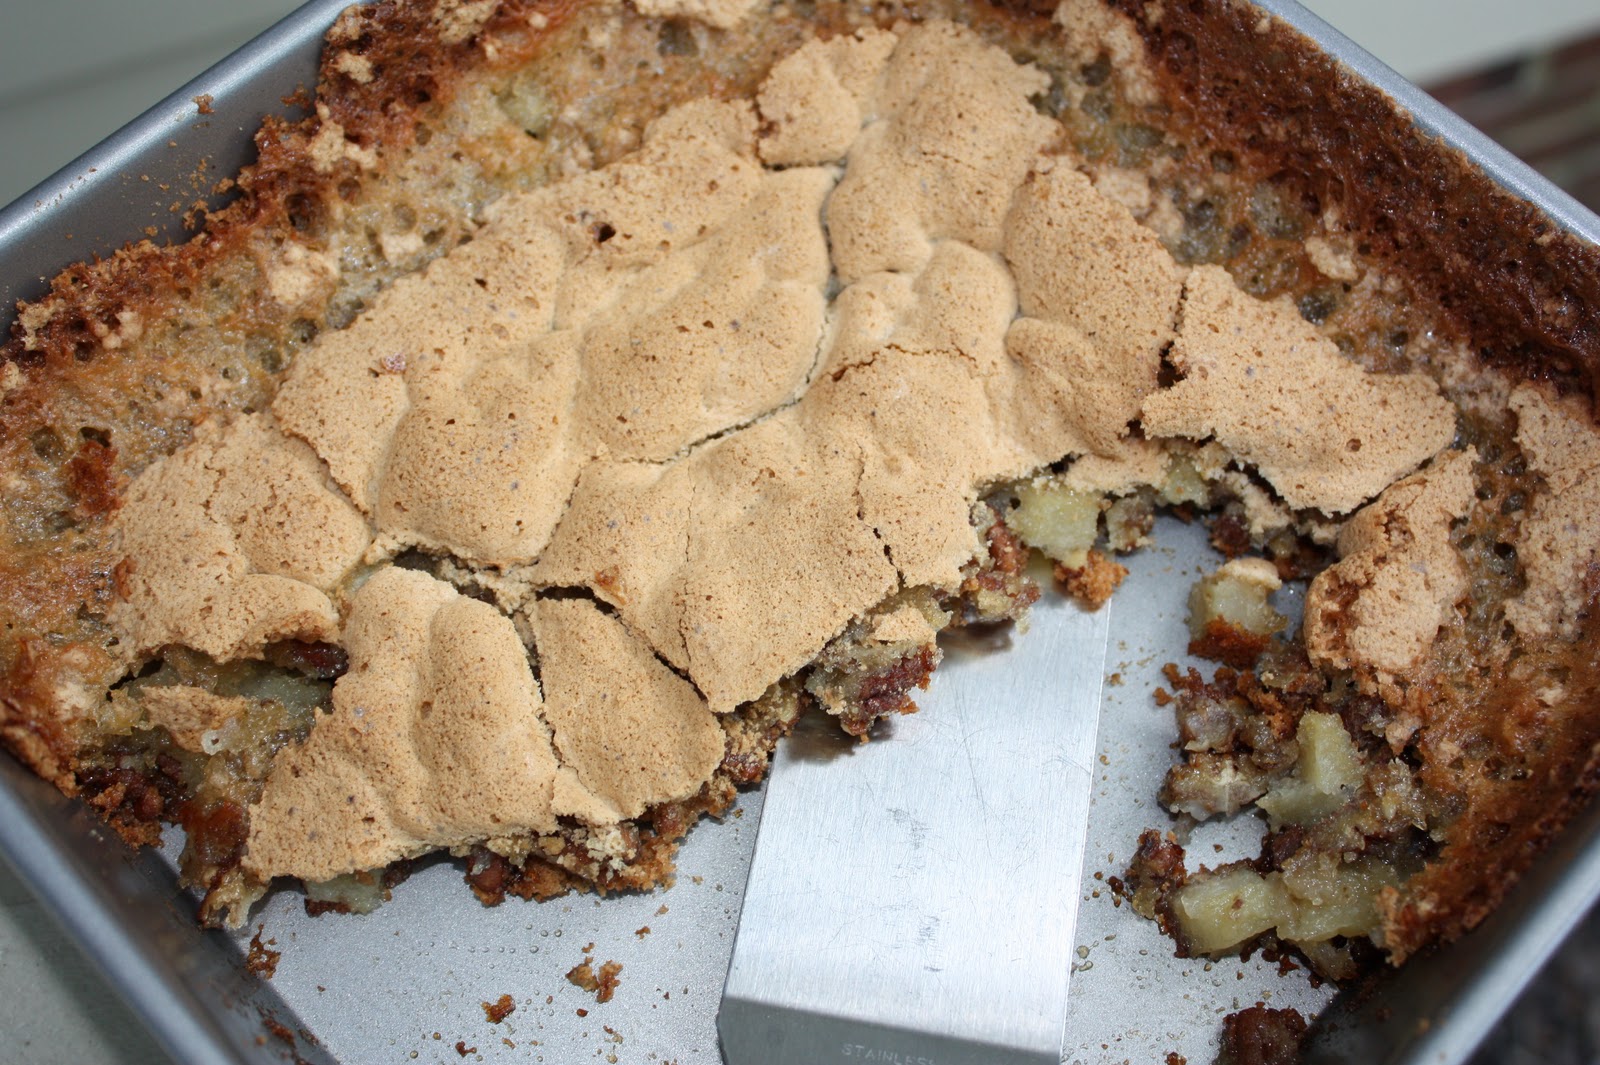
The wedding is done, and we had a fantastic weekend!  And the cake turned out well which I could not have done without the help of my dear college friend Lance!!  Thanks to her secret icing recipe and talking me through some basics, it all came together!  She is a fantastic baker, and if you live in Vermont or even if you don’t, you should check out her stuff on her facebook page Takes The Cake Vermont.   The photographer took better pictures, but I don’t have those yet, so here is the one I took at my house before transporting the cake.  The food was wonderful, the weather turned out well despite a torrential storm and flood on Friday night.  The water outside of my parents house where we had the rehearsal party was mid calf deep when people were trying to leave.  It added some drama, but it was really funny to see everyone with their pants rolled up and shoes off trying to get to their cars.  We are not really going on a honeymoon, but we are going to Savannah this weekend for a quick get-a-way.  Shockingly, I have never been to Savannah despite living in Charleston, so I am really looking forward to it.  I did take this past Monday off from work to relax, and while sunning on the porch, I came across a recipe for Huguenot Torte in the South of Broad magazine.  I have not had this in so long, and I was so happy to see a recipe for it.  Such a traditional Charleston recipe and so delicious.

Huguenot Torte

Ingredients:

4 eggs
3 cups sugar
8 tablespoons flour
5 teaspoons baking powder
½ teaspoon salt
2 cups chopped tart cooking apples
2 cups chopped pecans or walnuts
2 teaspoons vanilla

Directions:

Beat whole eggs in electric mixer or with a rotary beater until very frothy and lemon-colored. Add other ingredients in above order. Pour into two well-buttered baking pans about 8 x 12 inches. Bake in 325 degree oven about 45 minutes or until crusty and brown. To serve, scoop up with pancake turner (keeping crusty part on top), pile on large plate and cover with whipped cream and a sprinkling of the chopped nuts, or make 16 individual servings.


An Update on the Wedding Cake

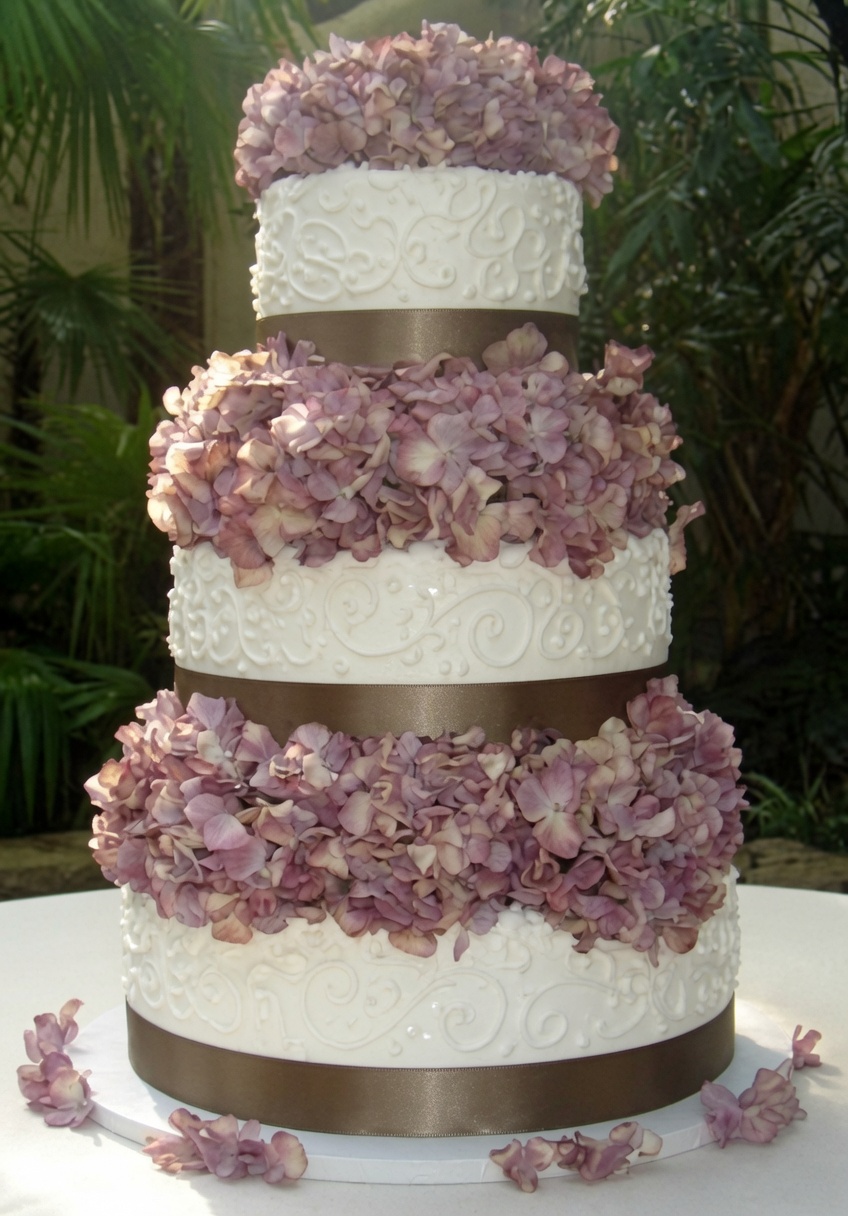
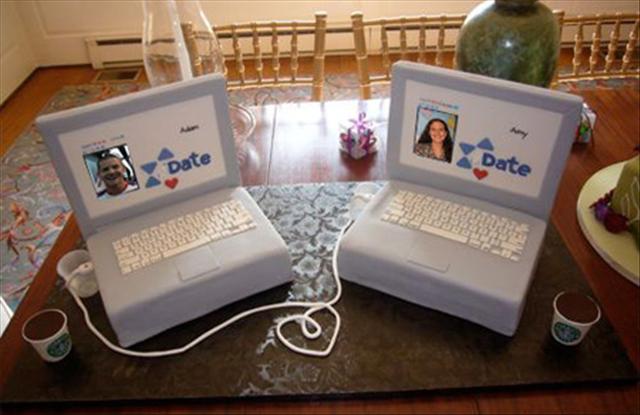
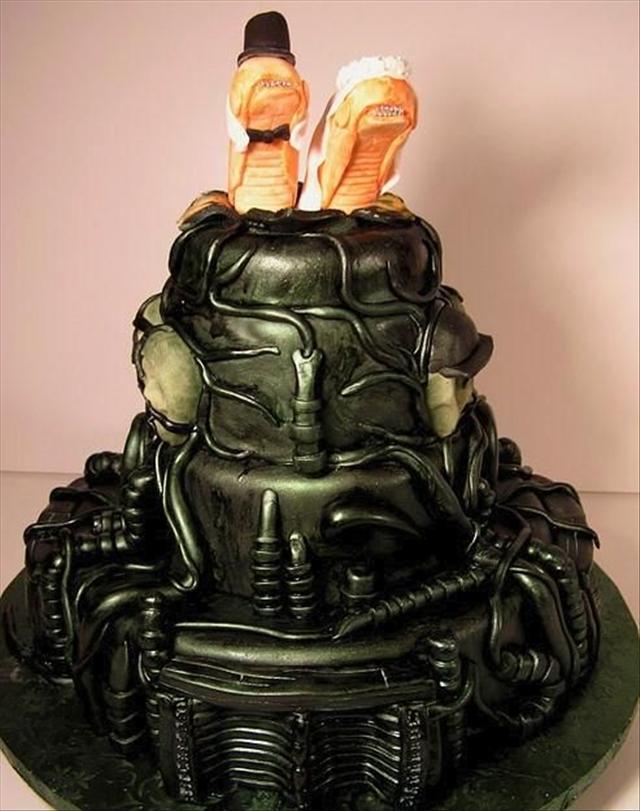
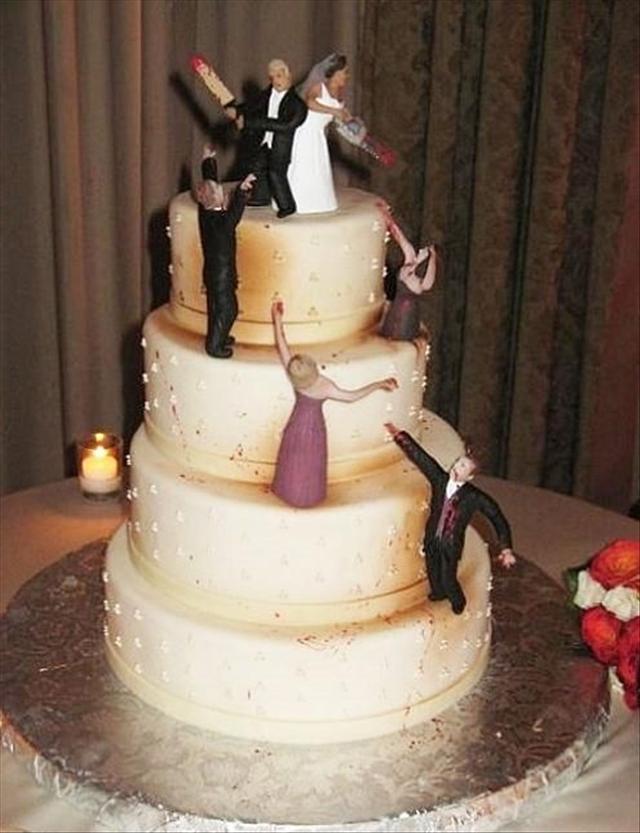
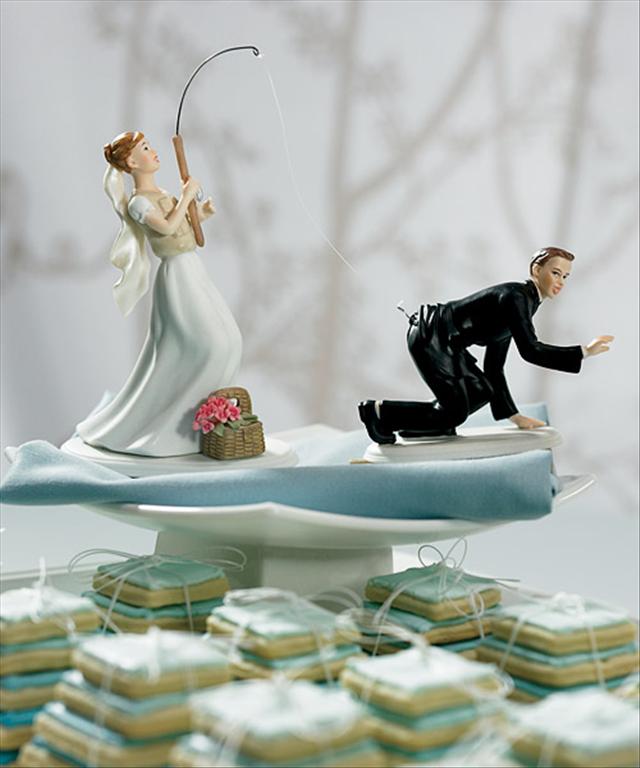
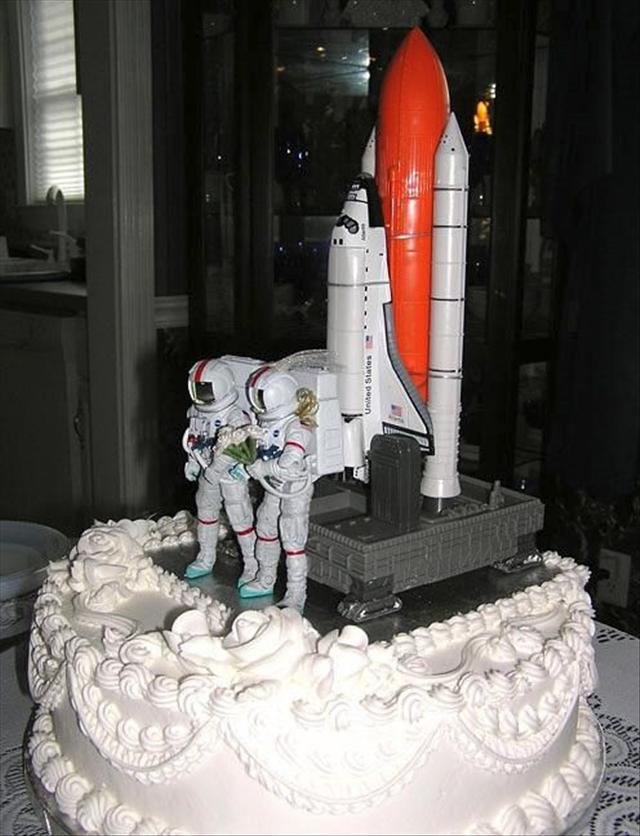
I am getting married in 8 days.  It is amazing how fast this has gone- granted I didn’t want much time between engagement and wedding, and everything is all done- except that I still have to make the wedding cake.  This is the only thing that I am feeling at all stressed about, but I figure if it doesn’t work out- I can always run the the grocery store and buy a cake or a lot of cakes- either way- should be fine, right?  This definitely has been an eye opening experience since I have now googled how to assemble/decorate a wedding cake and watched lots of videos.  For example, I was wondering how in a tiered cake is there frosting underneath the different tiers.  Apparently, you put each tier on cardboard and that way it is easy to disassemble and serve.  Also, I found out that you need to put supports in the cake so it all stays together.  Thank goodness for Amazon.com and there vast amount of baking supplies.  As for decorating, well that will just be a morning of creation.  In searching for decorating ideas, I came across a website of ridiculous wedding cakes 30 Hilariously Terrible Wedding Cakes.  I don’t think I will model our cake after any of these, but here are a few of my favorites!

A Wonderful Weekend

In addition to the Wine & Food Festival which kept Charleston in good eats all weekend, Corby and I got engaged!  Which now of course means I need suggestions on food and recipes to serve at the wedding.  Not one for long engagements, April 20th is the day- yes of this year.  I know most people focus on the dress, flowers, music, and of course the list- but we have all that done.  It might turn out to be a disaster, but I want to make our cake- this is what I am focused on.  While I have clearly made lots of cakes before and they have turned out well, decorating a cake- especially a wedding cake is not my great forte.  But I figure, as long as it tastes good, I can cover it with flowers and that should make it look pretty enough.  So onto a wedding cake recipe.  I found this recipe for a Butter Cake- what could be wrong with a Butter Cake?  My thought is to make two 9 inch cakes with a filling and then two 6 inch cakes with filling for a small 2 tier cake.  The filling that I want to try is a vanilla custard, and found a great recipe for that- see below.  And then of course, what kind of icing to use- I think butter cream to go with a butter cake of course!  I will be attempting to make a test cake this weekend with all of these recipes.  Stay tuned to see how it turns out, and clearly the picture is how I assume it will turn out!  Any suggestions, tips, etc are incredibly welcome!!  Should be a piece of cake right- haha!

Butter Cake

(from www.wilton.com)
Ingredients:

1 1/2 cups butter, room temperature

2 1/2 cups granulated sugar

5 eggs

1 teaspoon pure vanilla extract

3/4 teaspoon no color almond extract

3 cups all-purpose flour

3/4 teaspoon baking powder

1/4 teaspoon salt

1 cup milk

Directions:

Preheat oven to 350°F. Spray pans with vegetable pan spray, or use Cake Release.

In mixer bowl, cream butter and sugar until light and fluffy. Add eggs one at a time, mixing well after each addition. Mix in vanilla and almond flavor. Mix flour with baking powder and salt. Add flour mixture alternately with milk, starting with the flour; mix well. Pour into prepared pans. (for me- two 9 inch pans and two 6 inch pans)

Bake the 6 inch pans for 25-30 minutes and the 9 inch pans for 30-35 minutes

Cool 10 minutes in pan. Loosen sides and remove. Cool completely before decorating.

Vanilla Custard Filling

(from www.wedding-cakes-for-you.com)

Ingredients:

2/3 cup granulated sugar
2 Tablespoons cornstarch
2 tablespoons all purpose flour
pinch of salt
4 large egg yolks or 2 whole eggs
2 cups milk
1 vanilla bean or 2 teaspoons of vanilla extract
2 Tablespoons unsalted butter

Directions:

On a piece of plastic wrap , or in a small bowl, combine the sugar, cornstarch, flour and salt. In a saucepan combine and whisk together the egg yolks and milk, or whole eggs if you are using them.

Gather the corners of the plastic wrap, or the bowl and pick up the starch mixture, pour it on top of the eggs and milk and whisk well to be sure that all of the cornstarch and flour are dissolved.Add the vanilla bean. (if using the extract add it at the end of the recipe.

Set the pan over moderate heat and cook the custard for about 12 minutes, until thickened and brought to a boil. To do this stir on and off for the first 5 minutes, then stir constantly for 7 minutes longer until the cream really thickens and reaches a boil.

Remove pan from the heat. The cream is done when smooth and thick enough to leave a clearly defined line when you draw your finger through the cream coating the back of the spoon.

Remove the vanilla bean, rinse it, and set it aside to re-use. If you are using extract instead of the bean add it now. Add the butter and whisk until melted and blended in.

Pour the cream through a sieve into a bowl. Stir in any additional flavoring if using it. To prevent a film from forming on top of the cream, press a piece of plastic wrap onto the surface. Cool cover and refrigerate until ready to use.

Butter Cream Icing

(from www.smittenkitchen.com)

Ingredients:

For a wedding cake (or most of one, depending on the size)
2 cups of egg whites (approx. 12 large)
3 cups sugar
5 cups butter, softened (2 1/2 pounds, 10 sticks)
1 tablespoon vanilla extract

For a 9-inch cake (plus filling, or some to spare)
1 cup sugar
4 large egg whites
26 tablespoons butter, softened (3 sticks plus 2 tablespoons)
1 teaspoon vanilla extract

Directions:

Whisk egg whites and sugar together in a big metal bowl over a pot of simmering water. Whisk occasionally until you can’t feel the sugar granules when you rub the mixture between your fingers.

Transfer mixture into the mixer and whip until it turns white and about doubles in size. (Here’s a tip: when you transfer to the mixer, make sure you wipe the condensation off the bottom of the bowl so that no water gets into the egg whites. This can keep them from whipping up properly.)

Add the vanilla.

Finally, add the butter a stick at a time and whip, whip, whip.

 

Mocha Chiffon Cake

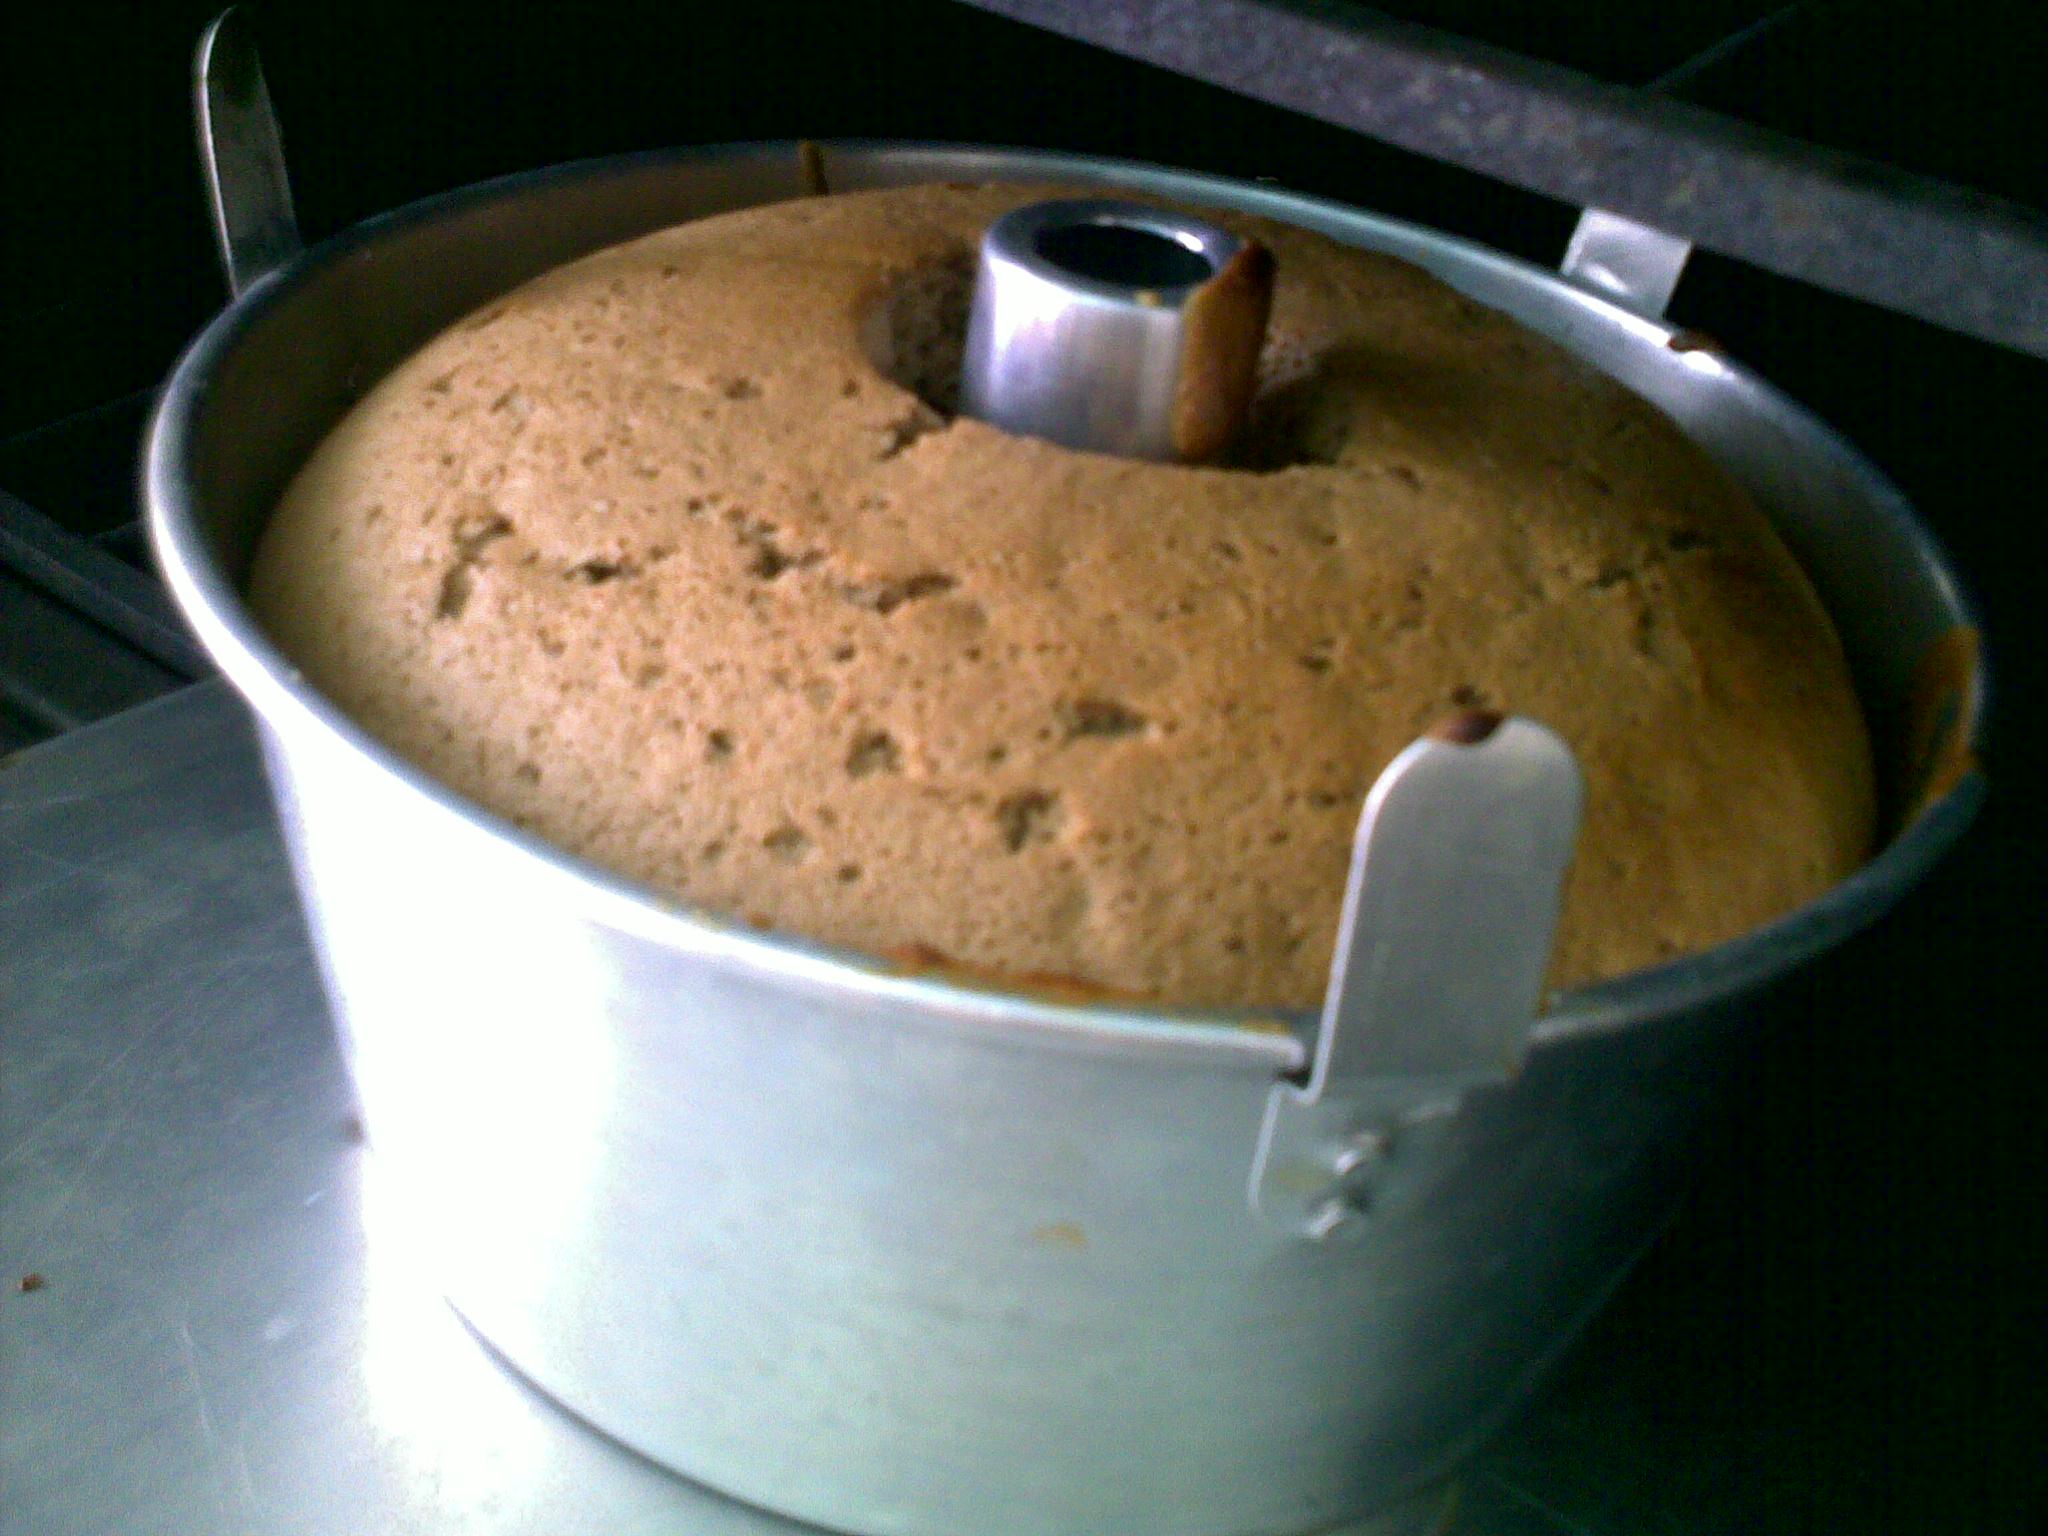
I was flipping through the channels on Saturday morning and stopped at a cooking show where two women were making a chiffon cake.  Of course I was inspired immediately, so instead of watching the rest of the show or even figuring out what show it was, I started googling chiffon cake recipes.  There are quite a few ways to make a chiffon cake, but the mocha chiffon cake caught my eye.  My mother makes the best chocolate mocha torte (which I will have to put up at some point because it is so good), and the mocha taste is just heavenly.  I love this lighter version where the cake is not as heavy, and the frosting is optional but who opts for no frosting?

Mocha Chiffon Cake

Ingredients:

2 1/3 cups all-purpose flour
1 cup white sugar
1 tablespoon baking powder
1 teaspoon salt
2/3 cup brewed coffee
1/2 cup cooking oil
8 egg yolks
8 egg whites
1/2 teaspoon cream of tartar
1/2 cup white sugar

Directions:

Preheat an oven to 325 degrees F (165 degrees C).
Sift the flour, 1 cup sugar, baking powder, and salt together in a bowl. Make a well in the center of the flour mixture. Pour the coffee, oil, and egg yolks into the well; beat well by hand until the batter is smooth with no lumps.
Beat egg whites with the cream of tartar in a large bowl until foamy. Gradually add 1/2 cup sugar, continuing to beat until stiff peaks form. Lift your beater or whisk straight up: the egg whites should form a sharp peak that holds its shape. Fold the batter into the egg whites; pour into a non-stick Bundt® fluted tube pan.
Bake in the preheated oven until a toothpick inserted into the center comes out clean, about 60 minutes. Cool in the pans for 10 minutes before removing to cool completely on a wire rack. Loosen the sides with a knife and release the cake onto a serving platter.
Mocha Buttercream Icing:

For the Mocha Buttercream

1 1/2 cups butter, softened
3 cups powdered sugar
4 tablespoons cocoa powder
2 teaspoons vanilla extract
2 tablespoons instant coffee, dissolved in a splash of hot water

Directions:

In your mixer, beat the softened butter with the powdered sugar until it is creamy.
Add in the cocoa powder, vanilla extract & coffee.

Beat with the mixer until it’s nice and fluffy (about a minute or 2)
This makes a perfectly spreadable frosting. The nice thing about it is that you can put it in the fridge to make it a little more firm if you would like.


The Manor Born Banana Cake with Coffee Buttercream

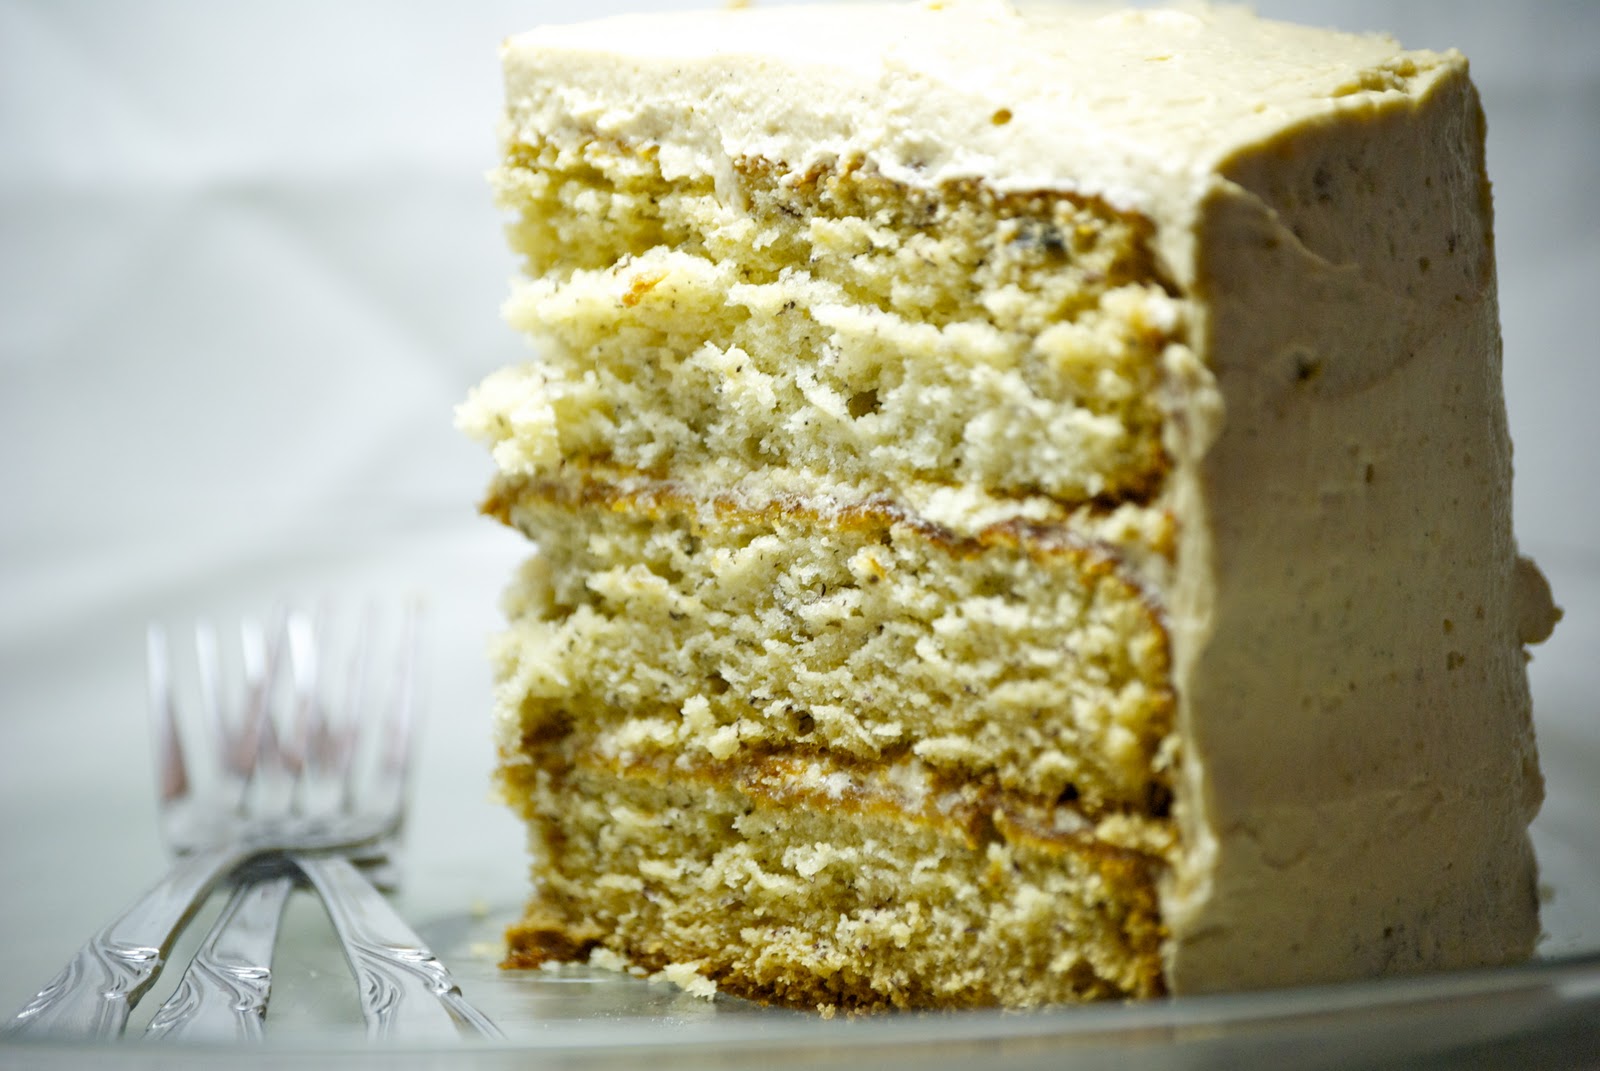
I love bananas in dessert.  They add such a wonderful flavor and creamy texture, and somehow any dessert with bananas evokes some great far-off memory I can never quite put my finger on.  Banana splits, banana pudding, banana bread- they are all delicious.  I came across this recipe in Saveur Magazine, and wow- it is something else.  The coffee flavor in the frosting is so amazing with the banana flavor in the cake.   This one is definitely a crowd pleaser and one to keep on hand!  And it works perfectly as a cake or as mini cupcakes.  The recipe is originally from Serendipity 3 in Manhattan- and according to Saveur, while it has not been on the menu since the 1960’s, it is still one of the owner’s favorite desserts.  Who can argue with that!

The Manor Born Banana Cake with Coffee Buttercream

Ingredients:

For the Cake:

8 tbsp. unsalted butter, softened
2 1/4  cups cake flour
2 tsp. baking powder
1 tsp. baking soda
1/4 tsp. salt
1 1/3 cups sugarhttps://thesouthwillrise.com/wp-admin/post-new.php
1 cup mashed ripe bananas (from about 2 medium bananas)
2 eggs
Scant 1/2 cup buttermilk
1 cup coarsely chopped shelled unsalted pecans

For the Frosting:

1 cup sugar
2 tbsp. instant espresso powder
6 egg yolks
1 lb. unsalted butter, cut into small pieces and softened

Directions:

For the cake: Preheat oven to 375°. Use 1 tbsp. of the butter to grease three 8″ round cake pans, line each pan with parchment paper, and set aside. Sift flour, baking powder, baking soda, and salt together into a medium bowl and set aside. Beat remaining 7 tbsp. butter and sugar together in a large mixing bowl with an electric mixer on high speed until fluffy, 3–4 minutes. Add bananas and beat on medium speed until well combined. Add eggs and buttermilk and beat until fully incorporated. Add flour mixture, stirring with a wooden spoon until just incorporated, then fold in pecans. Divide batter equally between prepared pans, smoothing tops with the spatula. Bake until cakes are golden brown and spring back when touched, 10–15 minutes. Cool cakes in their pans for 5 minutes on a wire rack, then remove them from pans, peel off parchment, and allow cakes to cool completely on the rack.

For the frosting: Combine sugar and 1/2 cup water in a small saucepan and boil over medium heat until sugar dissolves and syrup reaches 238° on a candy thermometer, 15–20 minutes. Meanwhile, dissolve espresso powder with 1 tsp. boiling water in a small bowl and set aside. Beat egg yolks in a medium mixing bowl with an electric mixer on high speed until pale yellow, 4–5 minutes. Gradually add hot sugar syrup to yolks in a slow steady steam down the side of the bowl, beating constantly on medium speed, and continue beating until mixture cools to room temperature, about 5 minutes. Add butter, one piece at a time, beating thoroughly on medium speed after each addition, and continue beating frosting until light and fluffy, about 5 minutes. Beat in espresso and set aside.

To assemble the cake, stack cake layers on top of each other on a cake plate, spreading about 1 cup of the frosting between each layer, then ice side and top of assembled cake with remaining frosting. Decorate cake by piping some of the frosting on top and garnishing with coffee beans, if you like. Refrigerate cake until frosting is set. Bring cake to room temperature before serving.

Not a trick Carrot Cake

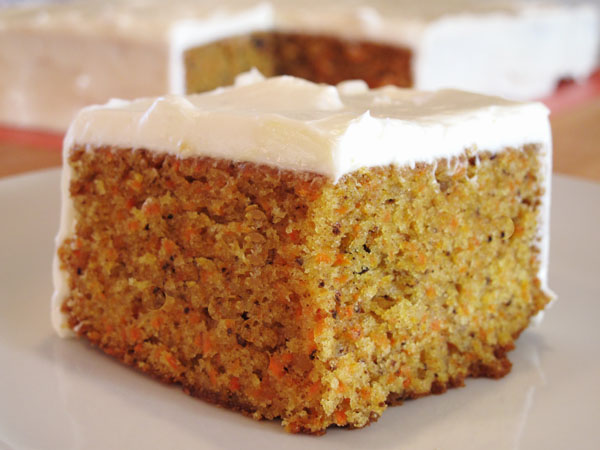
I used to think my mother was trying to trick me into eating vegetables when she would make carrot cake.  I also used think she was not being very sneaky since she called it carrot cake- clearly there were carrots in there.  So, of course I would scrape off the delicious cream cheese icing and not eat the carrot cake.  It wasn’t until actually recently that I ate carrot cake- the actual cake part, and it is freaking delicious.  Who knew!! And it turns out, my mom’s is the best- I might be biased but you can judge for yourself.


Carrot Cake

Ingredients:

2 cups flour

2 tsp baking powder

2 tsp baking soda

1 tsp salt

2 cups sugar

1 1/2 cups cooking oil

3 cups grated carrots

4 eggs

1/2 cup chopped nuts

Directions:

Sift first 6 ingredients into a bowl; stir in oil.  Add carrots and then eggs, one at a time.  Fold in nuts and bake at 300 for 45 minutes.

Cream Cheese Icing

Mix with hand mixer 1 package (8oz) cream cheese at room temperature, 2 tsp vanilla, 1/2 stick butter softened and 1 box of powdered sugar. (It is still the best part of the cake!)

Tomato for Dessert? Tomato Tart Tatin Might Change Your Mind

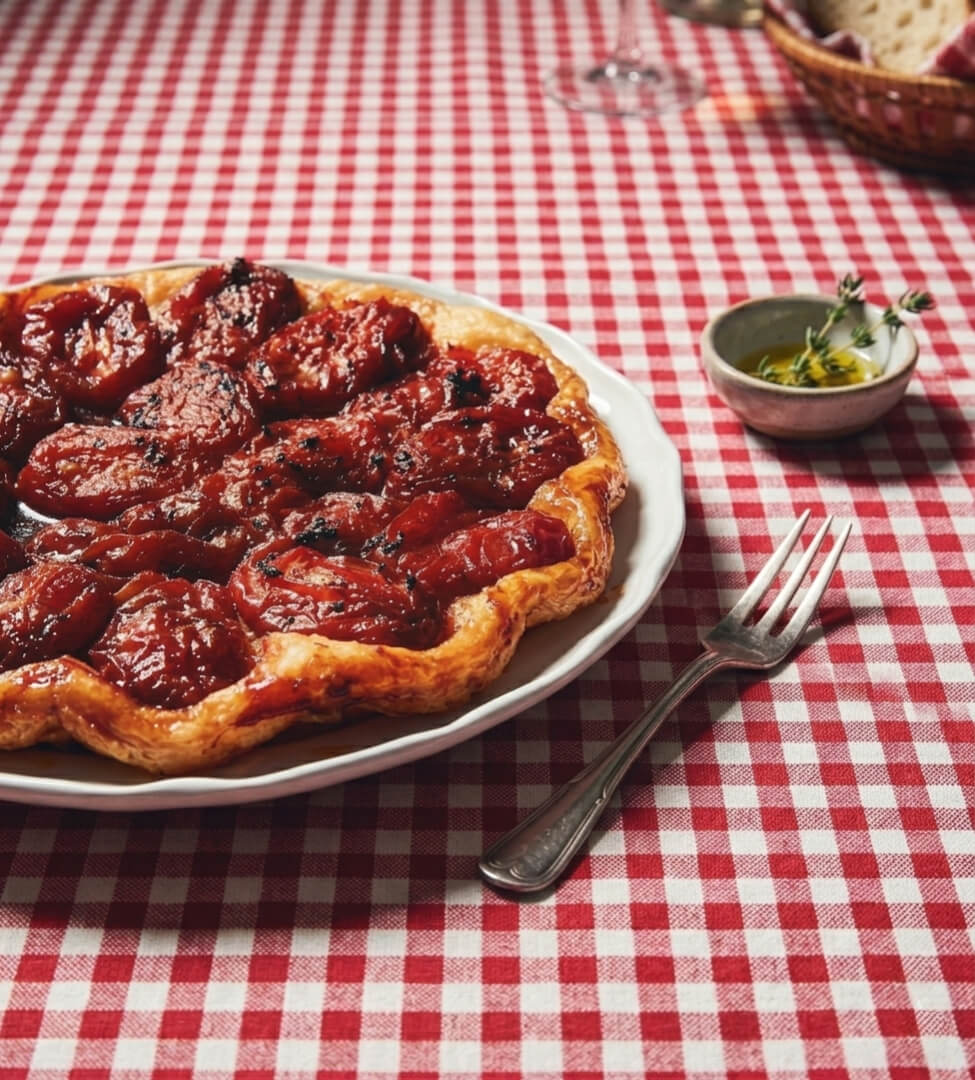
I went to a dinner party a while ago at a good friend’s house.  When she called to invite us, she immediately said, “I know you don’t like tomatoes, but I am making Tomato Tart Tatin for dessert, and you have to try it because I really think you will love it.” I realize that I need to give tomatoes another try since my dislike of them stems from a long ago childhood memory of my aunt’s wedding weekend.  Her soon to be niece was my age (we were 4 or 5 at the time), and we were going to be flower girls together, and so my mother and aunt arranged a pool play date for her soon to be niece and myself.  My co-flower girl was not that strong of a swimmer at the time and apparently I was swinging on a towel bar and kicked her (by accident!!)  into the pool – the shallow end- where she could touch- and she was fine.  But of course my mother, aunt and her mother all jumped into the pool fully clothed to help her out, and I was not the most popular person at the party.  After everything quieted down, they served tomato sandwiches for lunch.  My mother knowing that I was a particularly picky eater gave me the look that saying anything about not liking the sandwiches was not an option.  I think I ate 4 or 5 triangles of tomato sandwich saying they were the best thing ever- hoping that my mother would not be too mad at me on the car ride home.  Anyway- I survived and my aunt’s wedding was spectacular, and I have nothing but amazing memories of it except for swearing off tomatoes from then on.  I love tomato sauce and ketchup and really all variations of tomatoes except for eating them in their original form.  Until my friend’s dinner party.  I don’t remember what she cooked for dinner except that I am sure it was fabulous, but the Tomato Tart Tatin was really divine.  As my friend said, “I often forget my favorite vegetable is a fruit.”  The tart was so sweet and delicious and such an unusual but spectacular choice to finish off a dinner party.  She got the recipe from Bon Appetit at http://www.bonappetit.com/recipes/2010/08/tomato_tarte_tatin.  So unique and so wonderful!!

Tomato Tart Tatin

Ingredients:

1 3/4 pounds plum tomatoes (8 large)
3 tablespoons unsalted butter, room temperature
3/4 cup sugar
1 teaspoon vanilla extract
1 sheet frozen puff pastry (half of 17.3-ounce package), thawed, corners cut off to make very rough 9- to 10-inch round
Lightly sweetened whipped cream

Directions:

Preheat oven to 425°F. Bring large saucepan of water to boil. Cut shallow X in bottom of each tomato. Add 4 tomatoes to boiling water. Blanch tomatoes just until skins at X begin to peel back, 15 to 30 seconds. Using slotted spoon, transfer blanched tomatoes to bowl of ice water to cool quickly. Repeat with remaining tomatoes. Peel tomatoes. Cut out cores, halve lengthwise, and remove seeds.
Spread butter over bottom of 91/2-inch-diameter, 2- to 3-inch-deep ovenproof skillet (preferably cast-iron). Sprinkle 3/4 cup sugar over butter. Arrange tomato halves, rounded side down and close together, in concentric circles in skillet to fill completely.
Place skillet over medium heat. Cook until sugar and butter are reduced to thickly bubbling, deep amber syrup (about 1/4 inch deep in bottom of skillet), moving tomatoes occasionally to prevent burning, about 25 minutes. Remove skillet from heat. Immediately drizzle vanilla over tomatoes. Top with pastry round. Using knife, tuck in edges of pastry. Cut 2 or 3 small slits in pastry. Place skillet in oven and bake tart until pastry is deep golden brown, about 24 minutes.
Cool tart in skillet 10 minutes. Cut around sides of skillet to loosen pastry. Place large platter over skillet. Using oven mitts as aid, hold skillet and platter firmly together and invert, allowing tart to settle onto platter. Carefully lift off skillet. Rearrange any tomato halves that may have become dislodged.
Serve tart warm or at room temperature with whipped cream.

An Art Show, Cold Springs, and Cold Water Chocolate Cake

I am continually amazed at how my 9 year old son Walker has no fear.  No fear of jumping off 30 foot cliffs into raging water, no fear of being on a 30 foot cliff above raging water, no fear of cold water.  I am afraid of all of those things.  We have been going on a lot of hikes to different swimming holes this past week up in the mountains, and while I wear my bathing suit to all of them, getting in the water really just doesn’t happen.  Finally, we were at Babel Tower on a group hike where the picture to the left was taken, and Walker was begging me to go in.  There were about 40 people on this hike, most of whom I knew, but I stood on the edge of a 5 foot jump with a line of children behind me waiting to go, and I couldn’t do it.  I am not sure if it was the fear of jumping or the cold water, but I could not throw myself off of that terrifying cliff.  I did spot a ledge just about two feet off the water and climbed down to that one and finally jumped.  The water was freezing and the whole experience was just not that fun, but Walker, of course, made it all worth it by running up to me after I got out of the water, “I am so proud of you Mommy!” And then he went onto this jump. (My brother was with him and there were lots of other braver adults supervising just so you all don’t think I am a completely reckless mother.)  All of this cold mountain water got me thinking about using cold water in a recipe, so I googled “cold water cake” and found this great recipe on www.cooks.com for Cold Water Chocolate Cake.  I can’t think of anything better than chocolate cake after freezing water and a long hike!  The recipe is at the bottom.

I have to talk about the art show that we went to the other night.  Two wonderful family friends set up an art showfor the community at the Pavilion the other night, and I was blown away by their talents.  Bo is an amazing painter who  had pieces of her farm animals on display.  They were so beautiful and such interesting pieces.  Murray is the most talented quilter I have ever seen.  I have one piece of hers that I truly cherish.  Her quilts look like paintings or photographs of fantastic mountain scenes.  Here is an example of a piece she had in the show.  I am utterly in awe of her talent.  You can find more about her at her website  http://www.murrayjohnstonartquilts.com/.

We only have a few days left in the mountains and then back to Charleston where hopefully they have fixed the AC.  I can’t believe it is August already and school starts in two weeks.  Please send in any back to school favorite recipes or traditions- would love to post them!!

Cold Water Chocolate Cake

Ingredients:
3 cups flour
2 cups sugar
1 tsp salt
2 tsp baking soda
1/3 cups cocoa
1 tsp vanilla
2 tbsp distilled white vinegar
3/4 cups oil
2 cups very cold water


Directions:

Combine all ingredients in a large bowl with a whisk or fork. Pour into a 9 x 13-inch greased baking pan.  Bake at 350°F for 35 to 45 minutes and frost with your favorite fudge frosting.

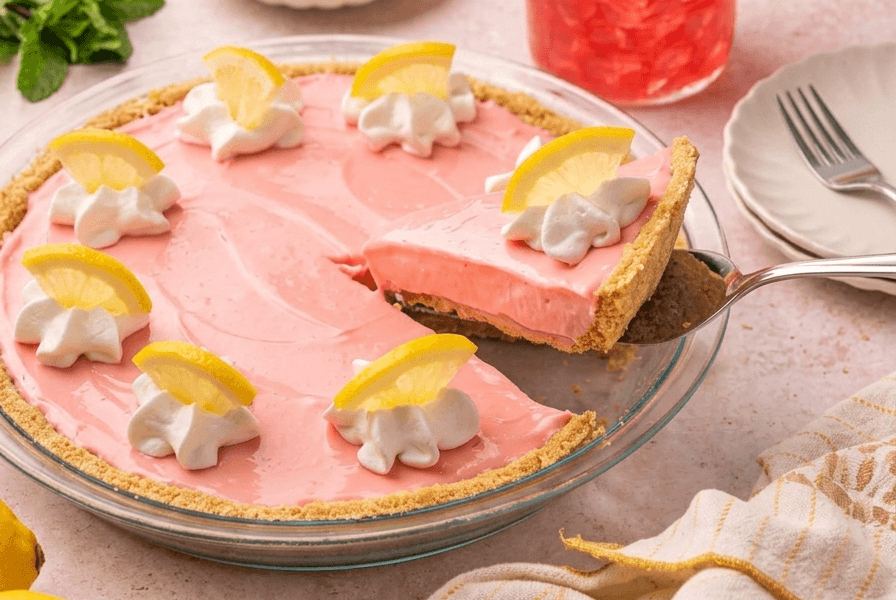
Pink Lemonade Pie

We got back from our month in the mountains on Saturday evening.  When we left Twilight on Saturday morning at 6:30 am, it was 56 degrees.  When we arrived in Charleston 14 hours and 40 minutes later at just after 9 pm, it was 86 degrees.  We had only been gone for 30 days, but that heat and humidity hit me something fierce.  I know I should be more used to it, but holy smokes Batman- it is hot down here.  We had such fabulous weather in the Catskills that I am sure the atmosphere will cooperate, and cool fall weather is just around the corner 🙂 Fortunately, one of my best girlfriends has a place very close by with a pool, and she has invited a few of us over tomorrow night for some pool/girl time.  To show my wondrous appreciation for her very nice cold relaxing pool, I thought I should bring something special to eat.  But then I thought about standing in the kitchen with the oven on and cooking and chopping and sweating, and I got so upset at my friend for inviting me to her pool, but then I thought about the pool again and how nice it is, and realized how ridiculous I was being.  So instead of cooking, I found a super awesome, super easy recipe for Pink Lemonade Pie that should be a perfect pairing with a frosty cold beverage, wonderful friends, and a great pool.  By the way, I love my friend, and if she wanted me to slave away in the kitchen, I would, but I think she will be very happy with this instead!

Pink Lemonade Pie

Ingredients:

1  can sweetened condensed milk
1  can frozen pink lemonade concentrate, thawed
1  container Cool Whip (thawed)
2 prepared graham cracker crusts

Directions:

In a large bowl, mix together sweetened condensed milk and lemonade concentrate. Fold in whipped topping. Pour into pie crusts. Refrigerate until completely chilled.

How easy is that!!


Please Shoo-Fly Pie

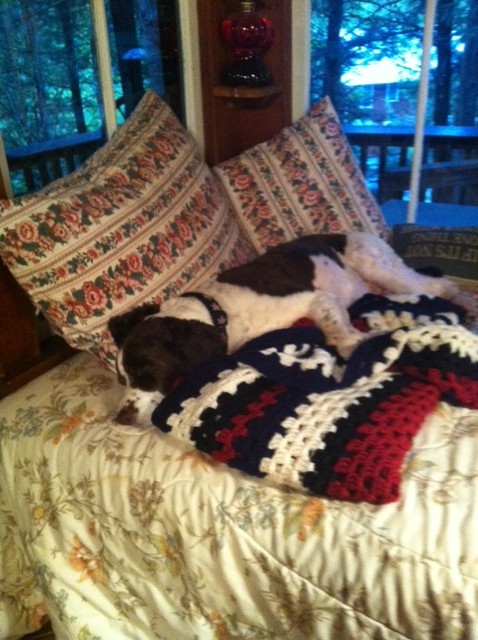
I went for my last hike up High Peak yesterday.  High Peak is actually the 22nd highest peak in the Catskills but because of its profile or where it sits, it looks like the highest peak- hence the name.  Anyway, the great thing about the hike is that I can actually walk out the door and walk to the trail head, and it is a very tough but not too long great workout.  I was pretty excited to get out into the woods and enjoy the peace and quiet.  It was not quiet though.  You know why?  I will tell you- the flies were so excruciatingly bad it was almost unbearable.  It is deer fly and horse fly season up here, and because of the very mild winter, it is one of the worst fly seasons ever.  I would rather take my chances with the bear who has been coming onto our porch at least once a week than deal with the flies.  I wish the ferocious beast Nemo would scare the flies away as well as he scares the bear away, but he is too busy sleeping.  In my  anger-induced delirium, I started thinking about Shoo-Fly Pie and what a great name it is (and of course, how delicious), and then I started thinking that maybe the flies would leave me alone if I was just a little more polite, so here is a great recipe for “Please Shoo-Fly Pie”.  We will see if it works when we go on our hike today- we are actually climbing the highest peak called Slide Mountain- wish me luck!

Please Shoo Fly Pie

Ingredients:

1/2 cup molasses
1 teaspoon baking soda
1 cup boiling water
1 pinch salt
1 1/2 cups all-purpose flour
1 cup brown sugar
3/4 cup butter
1/2 teaspoon ground cinnamon
1 9-inch unbaked pie crust

Directions:

Preheat oven to 375 degrees.

In a medium bowl, dissolve the soda in the molasses and stir until it foams. Sir in the boiling water and pinch of salt. In a separate bowl, mix the flour, cinnamon, brown sugar and butter into crumbs.

Pour 1/3 of the molasses mixture into the unbaked crust. Sprinkle 1/3 of the crumbs over the molasses mixture and continue alternating layers, finishing with the crumbs on top.

Bake in preheated oven for 30 minutes, or until the crumbs and crust are golden.