
Bourbon Chili

My dad has this saying that everything is good at the Waffle House except the waffles.  It is a big joke in our family, and I feel like this saying is apropos when I go to oyster roasts and say that my favorite thing is the chili.  However, since I can’t eat oysters and my dad can eat waffles- maybe not.  Anyway, we went to a dinner party the other night and were served the most delicious chili- actually it was bourbon chili which is probably why it was so good.  I have not experimented much in the making of chili just in the eating.  For instance, I did not even know there was a difference between regular chili and Texas chili (Texas chili doesn’t have beans), nor did I know that you never serve chili on the same day you make it.  It needs a day to marinate I guess.  Now that the days are getting colder- well not today since it is almost 80 degrees outside, but we have had some cold mornings when I wish I was wearing gloves on my bike ride to work, and chili is the perfect meal on a cold day.  Going to the best bourbon source, I found this recipe for Bourbon Chili on the Makers Mark website, and I can’t wait to try it (when it finally does get cold here). This looks delicious!!! And of course, here is a cute picture of Walker from long ago when it was cold.

Bourbon Chili

Ingredients:

1 cup Maker’s Mark® Bourbon
2 pieces dried Ancho chilies
1 piece dried Pasilla chile
2 pieces dried Guajillo chilies
2 pieces dried Chipotle chilies
1 tablespoon vegetable oil
2 pounds boneless beef short ribs
3 cups onion, chopped
2 cloves garlic, minced
1/2 teaspoon ground cumin
1 teaspoon Mexican oregano
1/2 teaspoon dried thyme
1/4 cup dark brown sugar
1/4 cup apple cider vinegar
1/2 cup masa harina, if desired
Salt and black pepper
Additional Maker’s Mark® Bourbon, if desired

Directions:

Toast the chilies in a large, dry skillet over medium-low heat until lightly charred and fragrant, about 10 minutes. Transfer to a bowl.
Bring 4 cups of water to a boil and pour over the chilies. Weight the chilies down in the water and submerge with a paper towel. Allow the chilies to soften for about 20 minutes in the hot water. Drain the chilies once they are soft, reserving the soaking liquid. If you prefer your chili to be spicy, remove only the stem of the chilies, leaving the seeds intact. If you prefer a milder chili, take the time to open up the softened chili peppers and remove the seeds before adding the peppers to the blender.
Add the softened chili peppers to the blender with 1 cup of Maker’s Mark®. Puree until smooth.
Heat a large skillet or Dutch oven over high heat. Pat the short ribs dry with a paper towel and season them generously with salt and black pepper. Add the tablespoon of oil to the hot pan. Reduce the heat to medium high. Sear the short ribs on all sides until well browned, about 3-4 minutes per side. Remove the short ribs to a plate and pour off the browning liquid and fat into a small bowl. Return the pan to the heat.
Add the chopped onion and minced garlic to the skillet and cook until softened, about 10 minutes, stirring often.
Add the cumin, oregano, thyme, brown sugar, vinegar, browning liquid, chile water and chile puree to the pot. Season with a heavy pinch of salt. Cover with a tight-fitting lid and simmer over low heat until the meat is very tender, about 3 hours, turning the ribs every 30 minutes and adding water as necessary if the braise becomes too dry.
Once the short ribs can break apart with a spoon, remove the ribs from the stew and break the short ribs apart into small chunks using two spoons or forks.
The chili braise in the pot should be the consistency of a thick soup. Reduce over low heat if necessary or add more water to reach desired consistency. Skim any excess fat and oil from the surface of the chili and discard. Stir the pieces of short rib back into the chili braise. Add an extra splash of Maker’s Mark® if you want.
Thicken the stew with masa harina (fine cornmeal makes a great substitute) if you desire: Ladle 2 cups of chili into a bowl and stir in the masa harina. Return the mixture to the pot and stir in with the rest of the chili. Simmer for 15 minutes. Serve the chili hot garnished with chopped scallions, cilantro and/or sour cream.


My New Braiser

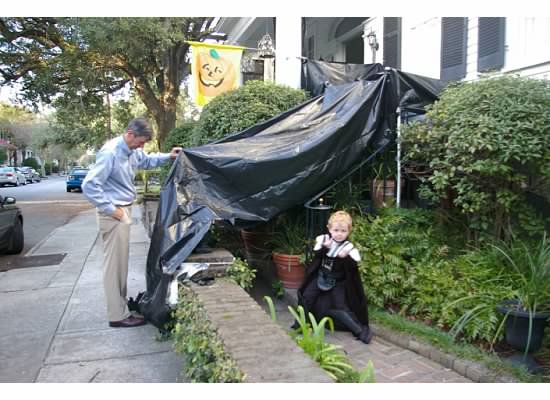
I hope everyone had a great Halloween and has transitioned into it getting dark at 6:00pm well- I am not quite down with it, and we spent the better part of the weekend arguing over why Daylight Savings Time exists.  It is not for the farmers as I previously thought but was suggested by a New Zealander because he wanted an extra hour of leisure time in the summer during daylight but after work.  Kind of ridiculous if you ask me, but I guess if I really was against it I could live in Arizona- the only state that doesn’t follow Daylight Savings. Here is a quick picture from Walker’s Halloween tunnel- huge success! Now that is over with, I can concentrate on my new favorite thing in my kitchen- my new Le Creuset Braiser.  My amazing friend gave it to me for my birthday- it is in Bone, and it is really awesome.  I have been looking for excuses to use it and trying to find new recipes for it constantly.  Since it is Le Creuset, I went to their site, and they have an awesome Easy Polenta recipe using the braiser.  It is fantastic!  Many more to come.

Easy Polenta from Le Creuset

Ingredients:

2 3/4 cups spring water
2/3 cup quick-cooking polenta
3 tablespoons freshly grated imported Parmigiano Reggiano

Directions:

Use the 3 1/2 QT. braiser on the range top for this. Add the water to the pan and bring it almost to a boil.

Gradually add the polenta to the pan, stirring constantly with a wooden spoon or spatula. When all the grains are added, reduce the heat to low and continue to cook, stirring frequently, until the polenta is thick, smooth and mounds easily. (If you detect any lumps, mash them with the tines of a heavy fork.) This will take about 5 minutes.

Remove the pan from the heat and fold in the cheese. Serve at once.

Halloween Costumes and Pumpkin Cheese Puffs

Halloween has always been Walker’s favorite holiday especially since we have moved back to Charleston.  He loves the carnival at school and of course the candy is great, but Walker actually doesn’t go in for trick or treating. Every year, Walker and my dad build a haunted tunnel up the front steps of my parents house, and Walker hides in the tunnel and scares the trick-or-treaters.  As he has gotten older, he has gotten much scarier in the tunnel.  We now have to ask children and their parents whether or not they want a big scare or a little scare.  If they want a big scare, then Walker has full reign to jump out and scare the living daylights out of them.  If they actually don’t want to be scared, then we have to yell to Walker in the tunnel to “tone it down” at which point he comes out completely disgusted and lets the children through the tunnel without scaring them.  While all this is going on, Corby, my dad and mom, and myself are sitting on the front porch (at the top of the tunnel) drinking wine and handing out candy.  By the end of the night, we are laughing so hard at Walker scaring people that he gets mad that we are ruining it and not making it scary enough.  To be honest, with this whole tradition, Halloween is my favorite holiday as well.  Here are some pictures of Walker through the years- first when I got to dress him up in whatever I thought was cute- then we moved on to a “Star Wars” stage (my favorite is the jazz hands Darth Vader), and then we got scary- initially with the Headless Horseman, and now he is just a zombie.  This year, I think I will add to the wine and candy aspect of the evening with this great recipe for Pumpkin Cheese Puffs that I found on www.tasteofhome.com.


Pumpkin Cheese Puffs

Ingredients:

2 tablespoons cream cheese, softened
1/2 teaspoon balsamic vinegar
1/2 cup water
1/4 cup butter, cubed
1/4 teaspoon salt
1/2 cup all-purpose flour
4 drops yellow paste food coloring
1 drop red paste food coloring
1/2 cup grated Romano cheese
2 eggs
20 sprigs fresh Italian parsley, stems removed

Directions:

In a small bowl, combine cream cheese and vinegar. Cover and refrigerate. In a large saucepan, bring the water, butter and salt to a boil. Add flour all at once and stir until a smooth ball forms. Remove from the heat; let stand for 5 minutes.
In a small bowl, combine the yellow and red food coloring; stir Romano cheese and food coloring into dough. Add eggs, one at a time; beating well after each addition. Continue beating until mixture is smooth and shiny.
Drop by level tablespoonfuls 3 in. apart onto a greased baking sheet. Bake at 400° for 15-20 minutes or until lightly browned. Remove to a wire rack to cool.
Using a star tip and reserved cream cheese mixture, pipe stems onto puffs. Add parsley sprigs. Refrigerate leftovers. Yield: 10 servings.

Weekend Reading and Blackberry Farm Pumpkin Pudding

Most weekends, outside of Walker’s football or other various sporting activities, we try to keep our days pretty free since we are usually so busy during the week.  A lot of this free time, Corby designates to reading time.  He can spend hours and hours reading the Wall Street Journal Weekend Edition or various magazines that have come in throughout the week.  Sometimes, when I would like to be doing something outside, I can get very slightly annoyed by all this superfluous reading, but most of the time, and this weekend being a prime example, the reading pays off.  Walker, who was waiting for Corby to take him to the aquarium, was less enthusiastic about waiting, but he is not as into recipe finds as I am.  In the Wall Street Journal Weekend edition this past weekend, they had an interview with Blackberry Farm’s Sam Beall.  What is not good about Blackberry Farm- I mean, this is a place that has gift bags waiting for you when you leave.  Dying to go!  It is a great interview, and if you can find a copy, it is definitely worth reading.  The best part is the recipe for Blackberry Farm’s Steamed Pumpkin Puddings with Tennessee Rum Hard Sauce.  This needs to be shared!  I am so excited to try this!

Steamed Pumpkin Puddings with Tennessee Rum Hard Sauce

Ingredients:

2 tbsps unsalted butter, melted, plus 8 tbsps unsalted butter at room temperature

1 1/2 cups all purpose flour

1 tsp baking soda

1 tsp kosher salt

1 tsp ground cinnamon

1/2 tsp freshly grated nutmeg

1/4 tsp ground coriander

1 cup natural cane sugar

2 large eggs

1 large egg yolk

1 cup pumpkin puree

1 cup buttermilk

Roasted pumpkin seeds to garnish

For the hard sauce:

4 tbsps unsalted butter at room temperature

3/4 cup confectioners sugar

pinch of freshly grated nutmeg

2-3 tsps fine dark rum

Directions:

1. Heat oven to 350 degrees.  Brush insides of six 6oz ramekins with melted butter.  Invert ramekins on a baking sheet and refrigerate to set butter (about 5 minutes).

2. In a medium bowl, whisk together flour, baking soda, salt, cinnamon, nutmeg and coriander.

3. In the bowl of a stand mixer with paddle attachment or large bowl with a hand mixer, beat 8 tbsps butter and sugar on high speed until light and fluffy.  Add eggs one at a time, followed by yolk and vanilla, beating well and scraping down side of bowl with a rubber spatula after each addition.  Beat in pumpkin puree and scrape down bowl.

4. Add flour mixture in thirds, alternating with buttermilk, beating each time only until the batter is smooth.

5. Divide batter among ramekins, keeping rims clean.  Pick up each ramekin and gently tap on counter to remove any air bubbles.

6. Take a lidded baking dish or Dutch oven large enough to hold ramekins with at least 1/2 inch of space between and line it with a folded kitchen towel (to hold ramekins steady).  Arrange ramekins in baking dish.  Pour enough very hot tap water into baking dish to come halfway up the sides of ramekins.  Cover baking dish tightly with lid.

7.  Bake until a toothpick inserted into the center of a pudding comes out clean and the top springs back when gently pressed, 30-40 minutes.  Remove lid and let puddings cool in water bath for 20 minutes.

8. Make hard sauce: In a medium bowl, beat butter with an electric mixer set to high speed until fluffy.  Reduce speed to low and add confectioners’ sugar.  When sugar is incorporated, increase speed to high, and beat until light and fluffy.  Add nutmeg and rum and beat a few more seconds.

9. Invert each ramekin onto a dessert plate and garnish with pumpkin seeds.  Serve with hard sauce.


Charleston- Best City in the World!

Conde Nast Traveler just named Charleston, SC the best city in the world (http://www.cntraveler.com/readers-choice-awards/top-cities-in-the-world-charleston-cape-town-bangkok-vancouver-photos#slide=1). Pretty impressive, and I completely agree, and I am not surprised.  Where else could my sweet Walker play on Civil War cannons looking out over the harbor- this city is amazing.  It is actually surprising how long it has taken for people to acknowledge this fact, a fact we in Charleston have known for quite a while.  And Between Mike Lata of FIG, Sean Brock of Husk, Ken Vedrinski of Lucca, Craig Deihl of Cypress and on and on, Charleston is also in my opinion the best food city in the world.  While the amazing food aspect of Charleston is relatively new- like in the last 15 years, the best parts of Charleston, the charm, the quaintness, and the history have always been here.  If you haven’t been to Charleston, you should.  Here is a very old school Charleston Shrimp and Grits recipe that would win Charleston awards even if it was a hole in the ground!  Very proud of my city.

Old Charleston Style Shrimp & Grits

Ingredients:

1 cup coarsely ground grits
3 cups water
2 teaspoons salt
2 cups half-and-half
 2 pounds uncooked shrimp, peeled and deveined
salt to taste
1 pinch cayenne pepper, or to taste
1 lemon, juiced
1 pound andouille sausage, cut into 1/4 inch slices
5 slices bacon
1 green bell pepper, chopped
1 red bell pepper, chopped
1 yellow bell pepper, chopped
1 cup chopped onion
1 teaspoon minced garlic
1/4 cup butter
1/4 cup all-purpose flour
1 cup chicken broth
1 tablespoon Worcestershire sauce
1 cup shredded sharp Cheddar cheese

Directions:

Bring water, grits, and salt to a boil in a heavy saucepan with a lid. Stir in half-and-half and simmer until grits are thickened and tender, 15 to 20 minutes. Set aside and keep warm.
Sprinkle shrimp with salt and cayenne pepper; drizzle with lemon juice. Set aside in a bowl.
Place andouille sausage slices in a large skillet over medium heat; fry sausage until browned, 5 to 8 minutes. Remove skillet from heat.
Cook bacon in a large skillet over medium-high heat, turning occasionally, until evenly browned, about 10 minutes. Retain bacon drippings in skillet. Transfer bacon slices to paper towels, let cool, and crumble.
Cook and stir green, red, and yellow bell peppers, onion, and garlic in the bacon drippings until the onion is translucent, about 8 minutes.
Stir shrimp and cooked vegetables into the andouille sausage and mix to combine.
Melt butter in a saucepan over medium heat; stir in flour to make a smooth paste. Turn heat to low and cook, stirring constantly, until the mixture is medium brown in color, 8 to 10 minutes. Watch carefully, mixture burns easily.
Pour the butter-flour mixture into the skillet with andouille sausage, shrimp, and vegetables. Place the skillet over medium heat and pour in chicken broth, bacon and Worcestershire sauce, cooking and stirring until the sauce thickens and the shrimp become opaque and bright pink, about 8 minutes.
Just before serving, mix sharp Cheddar cheese into grits until melted and grits are creamy and light yellow. Serve shrimp mixture over cheese grits.

Lowcountry Local First Field Feast- Food is Good

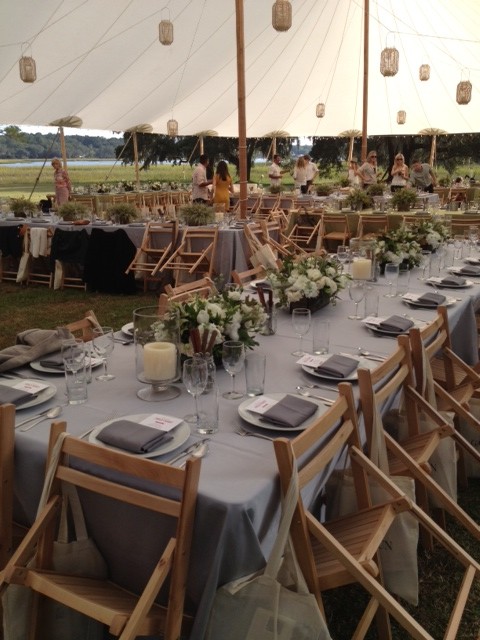
We went to the 4th annual Lowcountry Local First Field Feast on Sunday, and it was as expected- AMAZING!! The setting was spectacular out at Rosebank Farm on Wadmalaw Island.  The tent  was set up by the river, we enjoyed cocktails on the lawn with Long Miles played, and then we moseyed down to the dock for a cool breeze and a raw bar.  I had gone over the menu when we arrived, and by the time we sat down, I almost couldn’t contain my excitement for the meal.   Fire charred bread was served with pumpkin seed condiment and a yogurt dip.  We snacked on this yumminess while introductions and thank yous were given, and then we heard from the farmer about the cow named Link that we were about to enjoy.  Okra soup followed, and then we were onto the meat.  Plate after plate of the best meat and sauces and vegetables and beans came out of the side yard where it was all prepared by Chef Mike Lata and his unbelievable staff from FIG (which stands for Food Is Good and they are so right).  I am in awe of this group.  It was a little warm on Sunday, the bugs were out, and the serving staff from FIG had been there all day on their day off no less.  While they passed around the drinks and appetizers, helped cook and serve us all dinner (and there were about 180 of us), dealt with the rain that came pouring down right after the soup course- they all smiled, were cheerful, were the best wait staff I have ever seen.  I could not be more impressed.  Now, I need to make special mention of dessert.  Because I am still dreaming about it.  On the menu, it just said Sea Island Milk Candy.  I was curious.  When dessert was served, it was cream stuffed crepes with a caramel sauce that was just special.  I don’t want to even degrade it by superfluous adjectives.  It was just special. This is by far and away my favorite event in Charleston, and if you are ever able to go, I would jump on the tickets as fast as possible, and if you can’t make it, then you should just eat at FIG because it is the next best thing.
The Whole Pig

I have eaten a lot of pulled pork in the last two weekends.  It has been pretty awesome.  What I have been amazed at is the different ways said pork has been prepared and how tasty each different one is.  The first round of BBQ sandwiches was last weekend when we spent the day on the dock down in Wadmalaw.  My fantastic friends Brooke and Jodie said they were bringing some BBQ which was great because while I had dinner planned out, I had not done anything for lunch.  When we all got hungry from not catching any fish, Brooke ran up to the house to heat up the BBQ.  He came down with Jack Daniels new line of “ready to eat meats” Pulled Pork (http://jackdanielsmeats.com/products/PulledPork/index.html).  I must admit I was skeptical as I am not usually a fan of that kind of stuff, but this was really good.  The sauce was great, the meat was delicious, and it was so easy, and also the perfect size for just a few people.  Definitely a great thing to have in the fridge when you have a craving for BBQ.

The second event for pulled pork was this past Saturday night.  My brother and his wife have just recently moved to Charleston, and they had a house warming party.  Mac and cheese, biscuits, and pulled pork were on the dinner menu, and bourbon banana pudding and apple pie was for dessert.  It was pretty special.  Corby has cooked pulled pork on the grill a couple of times before, and it has been really delicious, but it takes forever!  He has to let it marinade in a brine for 24 hours and then he puts it on the grill for 8-10 hours, and it is just a huge effort that doesn’t happen very often.  Clearly, the low and slow technique is what good BBQ is all about, so why had I never thought to cook it in my crock pot like my sister in law did for Saturday night- genius!  As much as I love my crock pot and BBQ, I can not believe I have never done this!  Here is a great recipe I found for crock pot pulled pork- it is at the bottom.

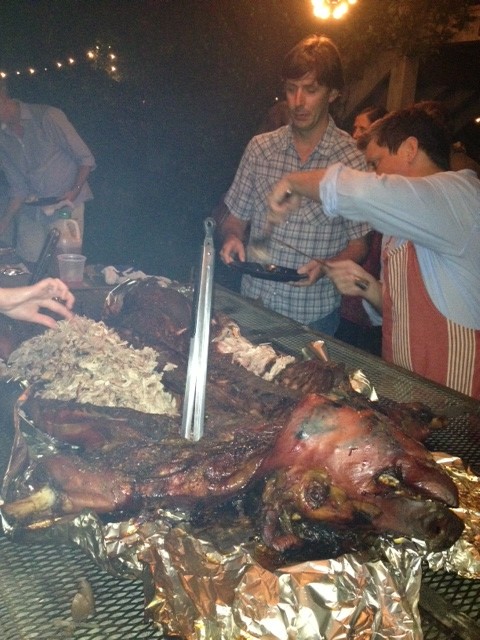
Now, the third eating of pulled pork was last night at a Lowcountry Local First (www.lowcountrylocalfirst.org) event out at some friend’s house on Sullivans Island.  It was a great event to raise money for LLF which is a great group supporting local farmers and connecting them with restaurants and people to buy local and eat local.  The hosts had spent some time getting ready for the party.  The house is amazing and looked beautiful, they had a great band, and they had cooked an entire pig in a pit in their yard.  A big, huge pig in a hole- slow cooked for hours and hours.  It was pretty impressive and oh my god good.  So basically, from store bought to crock pot to whole pig in the ground- pulled pork BBQ is pretty awesome no matter what.

Crock Pot Pulled Pork

Ingredients:

1 pork roast or butt (size depends on how much you want)

1 large Vidalia onion, sliced thin
2 tablespoons brown sugar
1 tablespoon paprika
2 teaspoon kosher salt
½ teaspoon freshly ground black pepper
1 (4-6 lb) boneless pork butt or shoulder
¾ cup cider vinegar
4 teaspoons Worcestershire sauce
1 ½ teaspoons crushed red pepper flakes
1 ½ teaspoons sugar
½ teaspoons dry mustard
½ teaspoon garlic salt
¼ teaspoon cayenne pepper

Directions:

Rinse pork roast under cold water and pat dry with paper towels.

Place onions in crock-pot. In a small bowl, combine brown sugar, paprika, kosher salt and pepper; mix thoroughly. Rub mixture all over roast and place the roast on top of the onions.

In a medium bowl, combine vinegar, Worcestershire, red pepper flakes, sugar, mustard, garlic salt and cayenne pepper; whisk to combine. Drizzle about 1/3 of vinegar mixture over roast. Cover and refrigerate remaining vinegar mixture.

Cover crockpot; cook on low for 10-12 hours. Drizzle about 1/3 of reserved vinegar mixture over roast during last ½ hour of cooking.

Remove meat and onions; drain. Chop or shred meat and onions. Serve with remaining vinegar mixture or your favorite barbeque sauce.


The Pioneer Woman’s French Toast

It was about this time last year that we were getting ready to head out to see Corby’s friend’s Ladd and Ree- otherwise known as Marlboro Man and The Pioneer Woman.  We stayed on their ranch for a few days and helped wrangle some cattle- it was pretty awesome.  Since that time, I have to say that I have done no wrangling, ranching or cattling.  However, I have of course been reading Ree’s blog and keeping up with her cooking.  I really enjoy reading her recipes because they are so tasty, but I also just have to laugh at her extensive use of butter, sugar and all things good.  I was looking at her recipe for Baked French Toast, and while I couldn’t (well actually I could because it is so delicious, but I would be very unhealthy and fat which I am not a huge fan of) eat this for breakfast every morning, on the occasional Saturday or Sunday, it is a huge treat!  Sugar, butter, heavy cream, more sugar, more butter, and bread- awesome.  While we are probably not going to make it out to the ranch this year, that will not stop me for enjoying her decadent Baked French Toast and all of her other wonderful recipes!

The Pioneer Woman’s Baked French Toast

Ingredients:

1 loaf Crusty Sourdough Or French Bread
8 whole Eggs
2 cups Whole Milk
1/2 cup Heavy Cream
1/2 cup Sugar
1/2 cup Brown Sugar
2 Tablespoons Vanilla Extract
Topping:
1/2 cup Flour
1/2 cup Firmly Packed Brown Sugar
1 teaspoon Cinnamon
1/4 teaspoon Salt
Freshly Grated Nutmeg, Optional
1 stick Cold Butter, Cut Into Pieces

Directions:

For the French toast: Grease the baking pan with butter. Tear the bread into chunks, or cut into cubes, and evenly distribute in the pan. Crack the eggs in a big bowl. Whisk together the eggs, milk, cream, granulated sugar, brown sugar and vanilla. Pour evenly over the bread. Cover the pan tightly and store in the fridge until needed (overnight preferably). Or you can make it and bake it right away—delicious no matter what!

For the topping: Mix the flour, brown sugar, cinnamon, salt and some nutmeg in a separate bowl. Stir together using a fork. Add the butter and with a pastry cutter, and mix it all together until the mixture resembles fine pebbles. Store in a plastic bag in the fridge.

When you’re ready to bake the casserole, preheat the oven to 350 degrees F. Remove the casserole from the fridge and sprinkle the topping over the top. Bake for 45 minutes for a softer, more bread pudding texture or for 1 hour-plus or more for a firmer, crisper texture.

Scoop out individual portions. Top with butter and drizzle with warm pancake syrup.

My attempt at baking bread

My mother’s homemade bread is the best.  I am not kidding- everyone loves it.  She gives it away as presents for Christmas, birthdays, new babies, house warmings- it is perfect for every occasion.  She makes loaves and loaves of it at a time and then freezes them so that she always has bread to pull out if she needs it.  She could make it in her sleep.  The first time I tried to make it when I lived up in New York, I had her on the phone with me walking me through the steps.  I thought it was going pretty well, then she said, “Now just add some flour until it is not sticky.”  I am the kind of person who needs more specific directions than “some flour”.  My bread turned out okay but not great, and I definitely added too much flour.  I gave up- it was just much easier to have her make the bread and send it to me or make a bunch when she would come to visit.  Both my sister and sister-in-law have mastered the skill of my mother’s bread.  My sister, who just moved to Vietnam with her husband and two little girls, even can make it over there.  She did have to improvise since she did not have a rolling pin, but apparently a wine bottle works just as well.  I, on the other hand, have never tried to make her bread again, but I think it might be time.  Le Creuset has just come out with an on-line series called “Le Creuset Technique Series with Michael Ruhlman”, and the first one is about bread baking.  You can watch it here- it is fantastic http://lecreuset.com/ruhlman!  It has some wonderful ideas, and I can’t wait for the next story to come out- so inspiring.  Anyway- here is my mother’s bread recipe.  I will be trying it this weekend and actually measuring the flour I use so that if and when I get it right, I will know how much and then can add it to the recipe for future generations to not struggle like me.  At the end when the dough is made, you can put it in a loaf pan and bake it, but my mother breaks it into three balls which she then rolls out into a rope and braids the bread.  It is very pretty.  And while this has nothing to do with bread- here is a fun picture of Walker I took last weekend.

My Mother’s Bread

Ingredients:

1 package yeast

½ cup sugar

2 cups warm water

 3 tbsp oil

2 eggs, at room temperature

1 tbsp salt

¼ cup dry milk powder

unbleached all-purpose flour (see how there is no amount to this- I am going to find out and fill it in!!)

Directions:

Mix yeast, sugar  and water in a big pot or dutch oven. After yeast, sugar and water have reached bubbling stage, whisk in the oil, eggs, salt and milk powder.  Gradually beat in flour, a cup at a time, until you need a spoon to stir flour in.  Continue to add flour until you can work with the dough and your hands are not sticky.  Let rise until double.  Beat down and add more flour.

Bake at 325 degrees for 20-25 min.

Atomic Blue- A new dipping sauce that will blow your mind!

Clearly one of the best things about fall is football season, and if you aren’t really into football, at least you can enjoy a good tailgate or “football watching” party.  However, I have found that these things tend to get a little repetitive in their food choices.  Wings, beer, chili, you get the idea.  Until now- this dipping sauce is really the perfect blend of spicy and cool blue cheese that makes whatever you dip into it a million times better.  It is so flavorful and interesting- I am completely hooked.  I also love the story behind it.  Three high school friends back in the late 80s and early 90s were tired of ketchup, mustard, mayo as their only condiments and came up with the recipe.  Then college and life got in the way, and it has taken them almost 20 years to get back together and realize that it is still the best dipping sauce and that there still is a need for it today.   Right now, you can order this at www.whatisatomicblue.com, and I have no doubt that you will be able to find it in grocery stores soon.  They will soon offer Atomic Salsa, Atomic Q, Atomic Ranch and Atomic Marinara which I know will be awesome.  So, if you want to add something special to your next tailgate or any event- give this a try!