Not a trick Carrot Cake

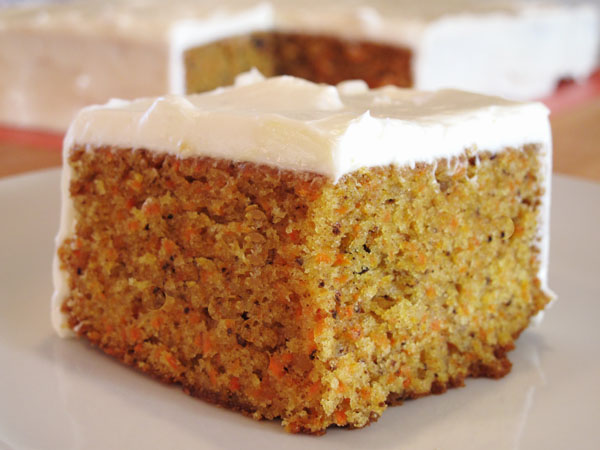
I used to think my mother was trying to trick me into eating vegetables when she would make carrot cake.  I also used think she was not being very sneaky since she called it carrot cake- clearly there were carrots in there.  So, of course I would scrape off the delicious cream cheese icing and not eat the carrot cake.  It wasn’t until actually recently that I ate carrot cake- the actual cake part, and it is freaking delicious.  Who knew!! And it turns out, my mom’s is the best- I might be biased but you can judge for yourself.


Carrot Cake

Ingredients:

2 cups flour

2 tsp baking powder

2 tsp baking soda

1 tsp salt

2 cups sugar

1 1/2 cups cooking oil

3 cups grated carrots

4 eggs

1/2 cup chopped nuts

Directions:

Sift first 6 ingredients into a bowl; stir in oil.  Add carrots and then eggs, one at a time.  Fold in nuts and bake at 300 for 45 minutes.

Cream Cheese Icing

Mix with hand mixer 1 package (8oz) cream cheese at room temperature, 2 tsp vanilla, 1/2 stick butter softened and 1 box of powdered sugar. (It is still the best part of the cake!)

Hot Chocolate Pudding

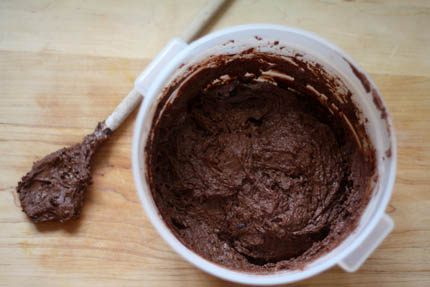
Every year when I was little, we would spend either Thanksgiving or Christmas at my grandparent’s house.  It was always a lot of fun being with the whole family, but the best part every year was dessert.  My grandmother used to make the most amazing dessert that I had always known as “Gook” but that is not its actual name- actually it was hot chocolate pudding.  I don’t know why it was called that other than maybe a combination of gooey cake, but either way- it is awesome.  For some reason around when I was ten or twelve, we stopped having this as dessert, and while of course only complimentary things were said of the new dessert- everyone really just wanted the “Gook” back.  I decided to make it for dessert last week mainly because the weather seemed to call for a hot dessert, and I hadn’t had this goodness in about twenty years.  It was everything I remembered and more.  The recipe calls for two squares of unsweetened chocolate.  I got the best unsweetened chocolate I could find at the grocery store as opposed to just the regular Baker’s Unsweetened Chocolate.  I think better chocolate equals better dessert.  The squares however were much bigger than the regular squares that you find, so I added extra sugar and milk to the recipe. The other slight adaption that I made was I only had skim milk, and I thought that heavier milk was probably needed.  I also had heavy whipping cream in the fridge, so I used a little more than half heavy cream and the rest skim milk- this worked well but probably whole milk would be best.  Also, the recipe says to grease and flour a double boiler.  I had never heard of this, nor had anyone at the store where I went to buy my double boiler.  The reason behind this is because the bottom and edges of the pudding get cakey- which is the desired effect, so if the double boiler is greased and floured- it is obviously easier to get out.  This might be the most decadent, rich and delicious chocolate dessert I have ever had because basically what you are making is not fully cooked brownies- it’s pretty awesome.  Enjoy!!

Hot Chocolate Pudding

Ingredients:

1 egg

1/2 cup sugar

3 tbsp butter

2 squares unsweetened chocolate

1/2 tsp vanilla

1/2 cup milk

1 cup flour

1 tsp baking powder

1/4 tsp salt

Directions:

Beat egg and sugar together.  Melt butter and chocolate.  Add to sugar mixture, beating well.  Add vanilla and milk, then the flour sifted with the baking powder and salt.  Place in greased and floured double boiler for 1 hour.  Serve at once with whipped cream.


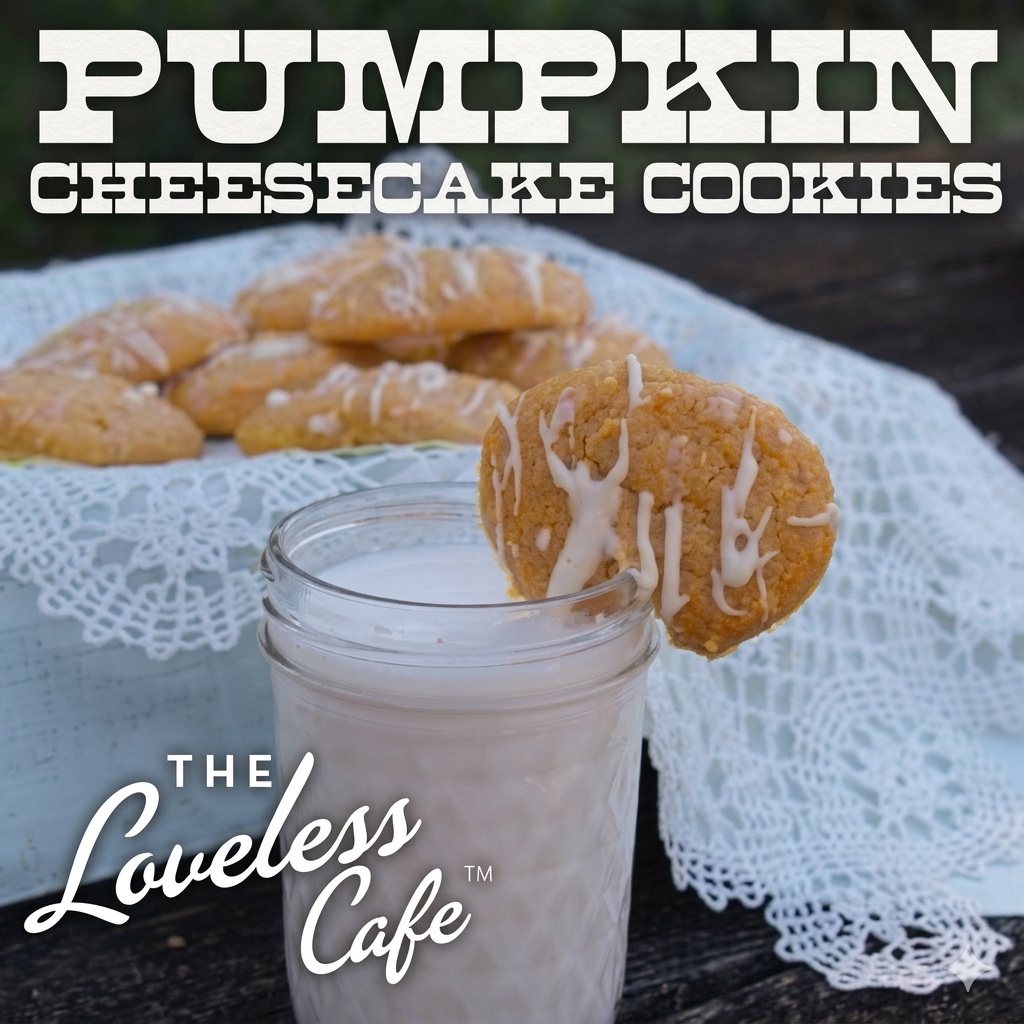
Loveless Cafe Pumpkin Cheesecake Cookies

I know that I have posted a bunch of recipes using pumpkin, but it is such a great fall ingredient and it tastes so good, so here is one more.  I made these this past weekend, and they are amazing.  Thank you to the Loveless Cafe in Nashville for another great recipe.  I will say that I did not have any Loveless Cafe Biscuit Mix which the recipe calls for and had to use Bisquick, so while I loved these little treats- I am assuming that they would probably have been better had I used the Loveless Cafe Biscuit Mix.  I will have to get some of that!


Pumpkin Cheesecake Cookies

Ingredients:

1 package cream cheese, softened

½ cup butter, softened

1 cup sugar

½ cup canned pumpkin

1 egg

½ tsp vanilla extract

1 cup flour

1 cup Loveless Cafe Biscuit Mix (or other biscuit mix)

½ tsp salt

½ tsp baking powder

½ tsp pumpkin pie spice

Directions:

In a large bowl, beat cream cheese and butter until creamy. Add sugar, pumpkin, vanilla and egg. In a separate bowl, combine flour and Loveless Cafe Biscuit Mix (or other biscuit mix), baking powder, salt and pumpkin pie spice. Mix dry ingredients with wet ingredients and place dough in refrigerator for 20 minutes.

In the meantime, line cookie sheet with parchment paper and preheat oven to 350°. Place spoonful’s of chilled dough on sheet about 1 inch apart. Bake 10-12 minutes. Let cool 2-3 minutes before putting on a cooling rack. Let cookies cool completely.

Ingredients for Maple Cream Cheese Icing:

4oz. cream cheese, softened

½ cup powdered sugar

½ tsp. vanilla extract

3 tbsps maple syrup

3-4 Tbs. milk (depending on desired consistency)

Directions:

Beat cream cheese until smooth. Add in powdered sugar, vanilla, maple syrup and milk. Drizzle on cooled cookies.

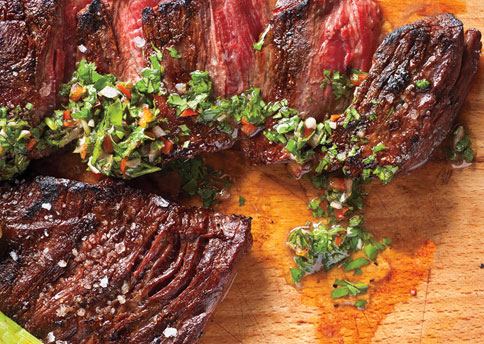
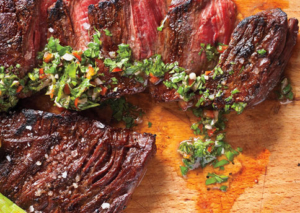
Skirt Steak with a Chimichurri Sauce

We had a few people over for dinner this past Friday night, and while I have heard that you are never supposed to serve something new at a dinner party, these were my best friends, so I thought that I could experiment on them.  Everything I made was a first time attempt.  It was a little nerve wracking, so I can see why people say not to do this.  However, things turned out very well, if I do say so myself.  I made skirt steak in a chimichurri marinade.  I had been served this at a dinner party over the summer, and it was amazing.  I googled chimichurri marinade, and several different recipes turned up.  The main difference between the recipes was the use of vinegar or not.  I chose one on www.epicurious.com that came from Bon Appetit.  It wasn’t until after I had read and reviewed about 15 different recipes and chosen this one as the best that I realized it was a Matt and Ted Lee recipe.  I should not be surprised as they are the best!  The only thing that I did slightly wrong was not leave the meat on the grill long enough.  I had bought about 4 lbs of meat in 2 pieces.  The directions I had read said to grill for 5 minutes per side.  I think my steaks were a little bit thicker but in fear of over cooking, I followed the 5 minute rule without checking the inside.  It was a little rare for my taste, but I put the middle section of the steak under the broiler for a few minutes, and it was great.  This is an awesome marinade and a delicious meal to serve- it will definitely be on my go to list!

Here is the recipe for the marinade.

Chimicurri Marinade

Ingredients:

1/2 cup red wine vinegar
1 teaspoon kosher salt plus more
3–4 garlic cloves, thinly sliced or minced
1 shallot, finely chhttps://thesouthwillrise.com/wp-admin/post-new.phpopped
1 Fresno chile or red jalapeño, finely chopped*
2 cups minced fresh cilantro
1 cup minced fresh flat-leaf parsley
1/3 cup finely chopped fresh oregano
3/4 cup extra-virgin olive oil
*At Whole Foods, I could not find a Fresno chili or red jalapeno, so I got a green one.  It turns out there is no difference between a red and green jalapeno other than the color and season in which they are grown.*

Directions:

Combine vinegar, 1 teaspoon salt, garlic, shallot, and chile in a medium bowl and let stand for 10 minutes. Stir in cilantro, parsley, and oregano. Using a fork, whisk in oil. Remove 1/2 cup chimichurri to a small bowl, season with salt to taste, and reserve as sauce. Put meat in a glass, stainless-steel, or ceramic dish. Toss with remaining marinade. Cover and chill for at least 3 hours or overnight.

Remove meat from marinade, pat dry, and grill.

Bourbon Chili

My dad has this saying that everything is good at the Waffle House except the waffles.  It is a big joke in our family, and I feel like this saying is apropos when I go to oyster roasts and say that my favorite thing is the chili.  However, since I can’t eat oysters and my dad can eat waffles- maybe not.  Anyway, we went to a dinner party the other night and were served the most delicious chili- actually it was bourbon chili which is probably why it was so good.  I have not experimented much in the making of chili just in the eating.  For instance, I did not even know there was a difference between regular chili and Texas chili (Texas chili doesn’t have beans), nor did I know that you never serve chili on the same day you make it.  It needs a day to marinate I guess.  Now that the days are getting colder- well not today since it is almost 80 degrees outside, but we have had some cold mornings when I wish I was wearing gloves on my bike ride to work, and chili is the perfect meal on a cold day.  Going to the best bourbon source, I found this recipe for Bourbon Chili on the Makers Mark website, and I can’t wait to try it (when it finally does get cold here). This looks delicious!!! And of course, here is a cute picture of Walker from long ago when it was cold.

Bourbon Chili

Ingredients:

1 cup Maker’s Mark® Bourbon
2 pieces dried Ancho chilies
1 piece dried Pasilla chile
2 pieces dried Guajillo chilies
2 pieces dried Chipotle chilies
1 tablespoon vegetable oil
2 pounds boneless beef short ribs
3 cups onion, chopped
2 cloves garlic, minced
1/2 teaspoon ground cumin
1 teaspoon Mexican oregano
1/2 teaspoon dried thyme
1/4 cup dark brown sugar
1/4 cup apple cider vinegar
1/2 cup masa harina, if desired
Salt and black pepper
Additional Maker’s Mark® Bourbon, if desired

Directions:

Toast the chilies in a large, dry skillet over medium-low heat until lightly charred and fragrant, about 10 minutes. Transfer to a bowl.
Bring 4 cups of water to a boil and pour over the chilies. Weight the chilies down in the water and submerge with a paper towel. Allow the chilies to soften for about 20 minutes in the hot water. Drain the chilies once they are soft, reserving the soaking liquid. If you prefer your chili to be spicy, remove only the stem of the chilies, leaving the seeds intact. If you prefer a milder chili, take the time to open up the softened chili peppers and remove the seeds before adding the peppers to the blender.
Add the softened chili peppers to the blender with 1 cup of Maker’s Mark®. Puree until smooth.
Heat a large skillet or Dutch oven over high heat. Pat the short ribs dry with a paper towel and season them generously with salt and black pepper. Add the tablespoon of oil to the hot pan. Reduce the heat to medium high. Sear the short ribs on all sides until well browned, about 3-4 minutes per side. Remove the short ribs to a plate and pour off the browning liquid and fat into a small bowl. Return the pan to the heat.
Add the chopped onion and minced garlic to the skillet and cook until softened, about 10 minutes, stirring often.
Add the cumin, oregano, thyme, brown sugar, vinegar, browning liquid, chile water and chile puree to the pot. Season with a heavy pinch of salt. Cover with a tight-fitting lid and simmer over low heat until the meat is very tender, about 3 hours, turning the ribs every 30 minutes and adding water as necessary if the braise becomes too dry.
Once the short ribs can break apart with a spoon, remove the ribs from the stew and break the short ribs apart into small chunks using two spoons or forks.
The chili braise in the pot should be the consistency of a thick soup. Reduce over low heat if necessary or add more water to reach desired consistency. Skim any excess fat and oil from the surface of the chili and discard. Stir the pieces of short rib back into the chili braise. Add an extra splash of Maker’s Mark® if you want.
Thicken the stew with masa harina (fine cornmeal makes a great substitute) if you desire: Ladle 2 cups of chili into a bowl and stir in the masa harina. Return the mixture to the pot and stir in with the rest of the chili. Simmer for 15 minutes. Serve the chili hot garnished with chopped scallions, cilantro and/or sour cream.

My New Braiser

I hope everyone had a great Halloween and has transitioned into it getting dark at 6:00pm well- I am not quite down with it, and we spent the better part of the weekend arguing over why Daylight Savings Time exists.  It is not for the farmers as I previously thought but was suggested by a New Zealander because he wanted an extra hour of leisure time in the summer during daylight but after work.  Kind of ridiculous if you ask me, but I guess if I really was against it I could live in Arizona- the only state that doesn’t follow Daylight Savings. Here is a quick picture from Walker’s Halloween tunnel- huge success! Now that is over with, I can concentrate on my new favorite thing in my kitchen- my new Le Creuset Braiser.  My amazing friend gave it to me for my birthday- it is in Bone, and it is really awesome.  I have been looking for excuses to use it and trying to find new recipes for it constantly.  Since it is Le Creuset, I went to their site, and they have an awesome Easy Polenta recipe using the braiser.  It is fantastic!  Many more to come.

Easy Polenta from Le Creuset

Ingredients:

2 3/4 cups spring water
2/3 cup quick-cooking polenta
3 tablespoons freshly grated imported Parmigiano Reggiano

Directions:

Use the 3 1/2 QT. braiser on the range top for this. Add the water to the pan and bring it almost to a boil.

Gradually add the polenta to the pan, stirring constantly with a wooden spoon or spatula. When all the grains are added, reduce the heat to low and continue to cook, stirring frequently, until the polenta is thick, smooth and mounds easily. (If you detect any lumps, mash them with the tines of a heavy fork.) This will take about 5 minutes.

Remove the pan from the heat and fold in the cheese. Serve at once.